There’s something so freeing about adding just a little bit of rebellion to your business. After all, why settle for doing things the way everyone else is when you can class it up and do it better?
There might be some pretty standard workflows that are worth adhering to (so you don’t have to reinvent the wheel) … but that doesn’t mean that you can’t add a bit of innovation along the way.
[Tweet “There’s no reason why you can’t add a bit of innovation to your life! #entrepreneur”]
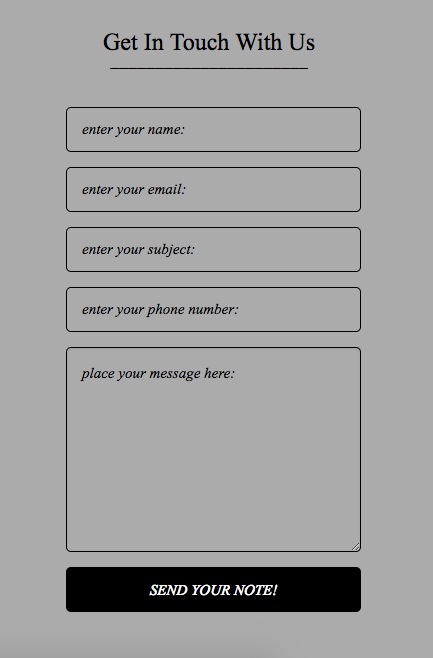
Think about it: There’s a pretty standard flow when it comes to online forms on your website.
First, you present the form to your clients. Then, they fill in the information and submit the form. Finally, they’re sent to a polite thank-you page to acknowledge the information went through.
It’s straightforward and effective.
But also kind of predictable.
Dress It Up With A Popup!
Sometimes, changing things up a bit can be as easy as adding a classy little popup into your sequence.
In this case, you can use a “Thank You Popup” instead of redirecting people to a different Thank You page after a form has been submitted on your website.
What happens, then, is this: your visitors receive your heart-felt message of thanks…without having to totally disrupt their browsing experience on your website.
It’s a polite and fancy way to show your appreciation.
How to Create A Thank You Popup After Form Submission With PopupAlly Pro
If you’re excited about this innovative tweak, here’s how to implement it in your own website with the PopupAlly Pro plugin for WordPress.
Step 1: Create Your Optin Form
First, you’ll want to create a beautiful, highly-converting optin form with PopupAlly Pro’s built-in design tools. Adding a pop up on WordPress is quick and painless with this plugin.

Step 2: Create Your Thank You Popup
Next, you can create and design the thank you popup that will appear after the form submission on your site.

Step 3: Designate Your Thank You Optin Settings
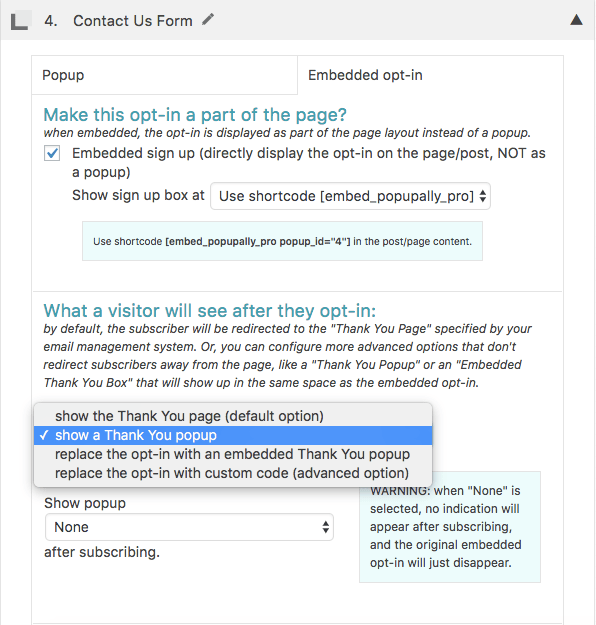
Now, with both your opt-in and your popup designed and ready to go, head over to the settings on your optin. Here, you can specify what you’d like to happen after the form has been submitted.

In this case, you’ll select show a Thank You popup.
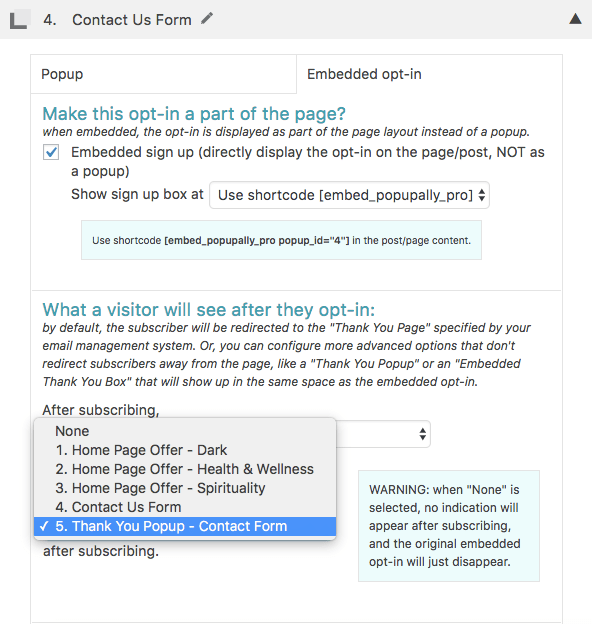
Step 4: Select Your Thank You Popup
As soon as you finish Step 3, you’ll be given the option to select your thank you popup from the list of created popups. Pick the one you want, and click save.

Voila!
Your PopupAlly Pro settings are all ready to go – now head out and impress your visitors with this super nifty feature!
Don’t Have PopupAlly Pro Yet?
Snag a copy of this sweet WordPress popup plugin here.