How Click-To-Open Popup Works
Create a click to open popup so when someone lands on the page and clicks the linked text or linked image, a popup will appear.
Video Tutorial of Click-To-Open Popup
Written Tutorial
Step 1: Configure the Display Settings
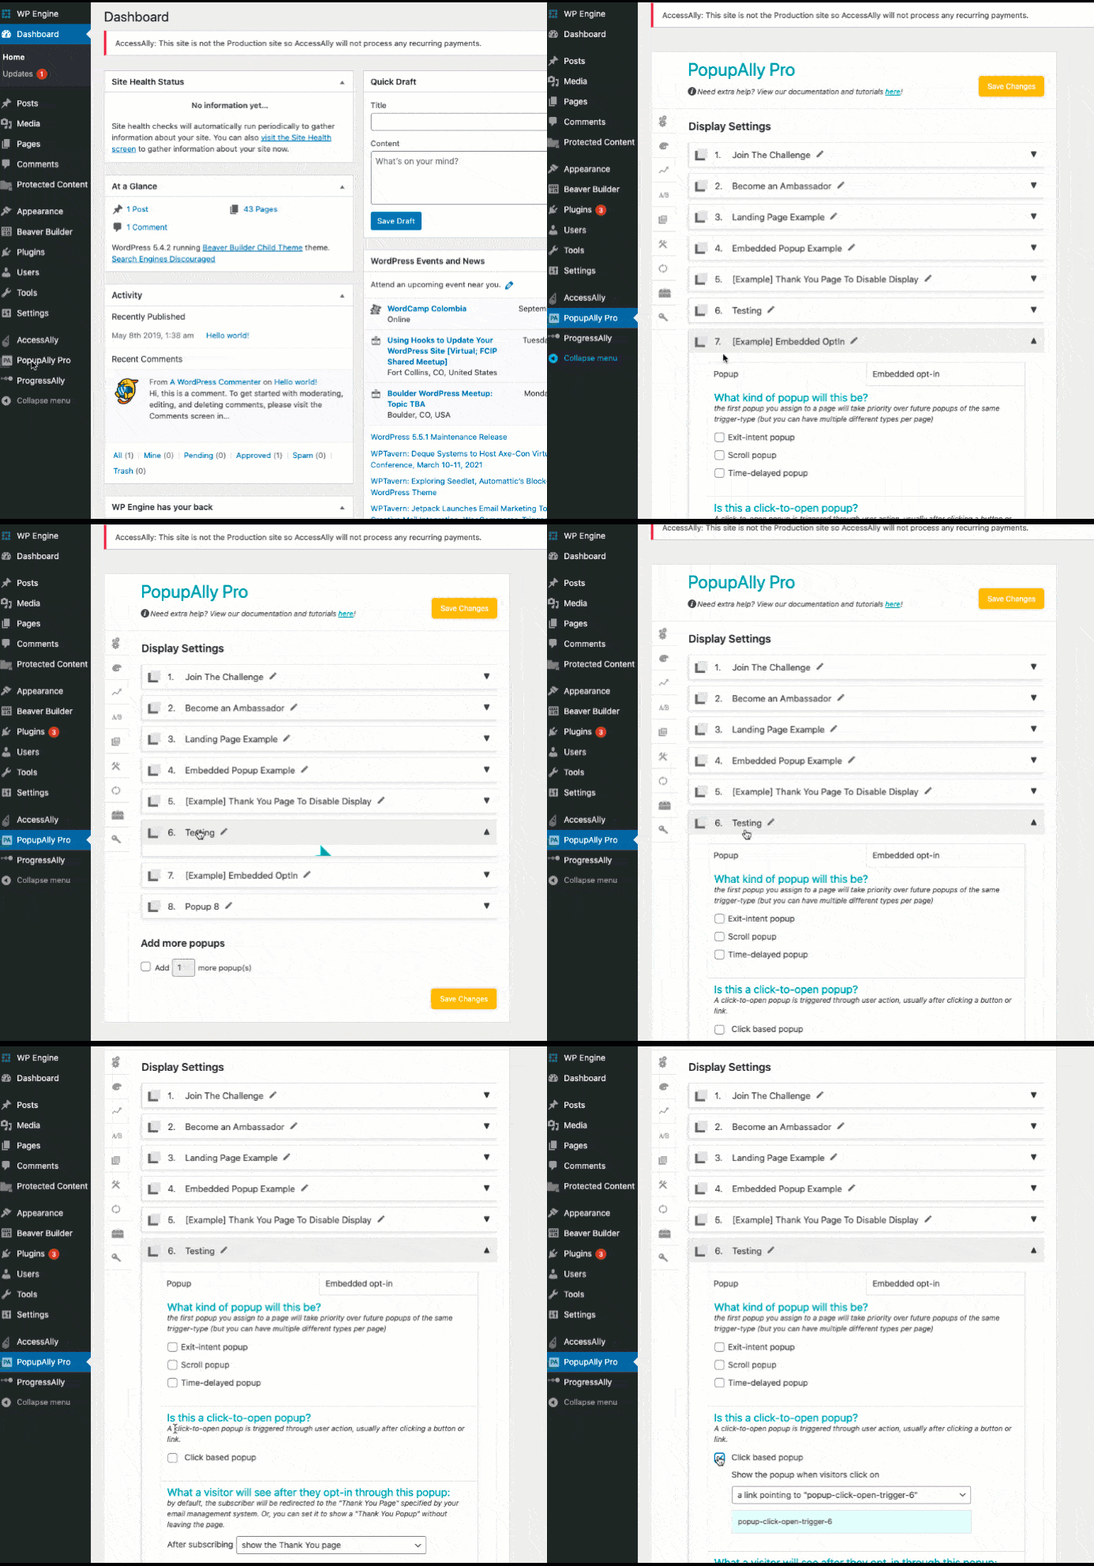
Go to: PopupAlly Pro > select the popup > Display Settings > Check the box to enable the “Is this a click-to-open popup?” setting
Step 2: Set the Click To Open Setting
There are two main options: a link or HTML class.
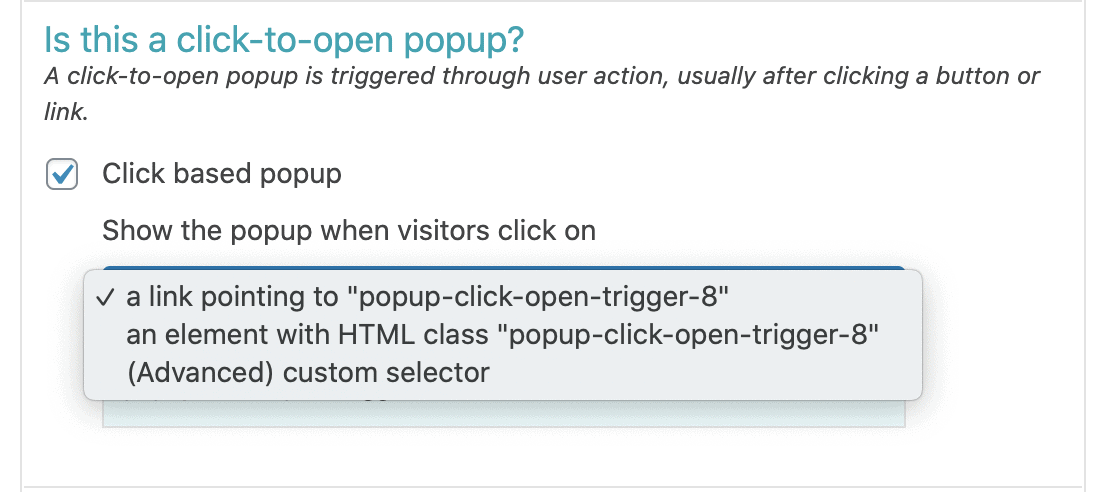
Option 1 (recommended): A link point to
Select “a link pointing to” option from the dropdown menu, then copy the code from the blue box and move to Step 3 in this tutorial.
Option 2: an element with HTML class
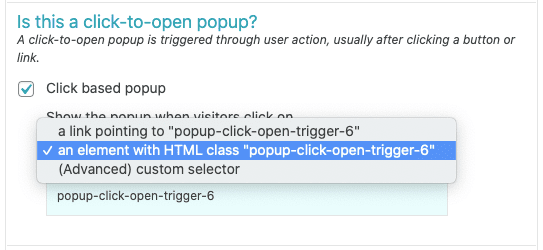
This is a more advanced option and you need a basic understanding of HTML code to implement.
Select “an element with HTML class” option from the dropdown menu, then select the class code from the blue box.
Note: You must select either Option 1 (recommended) or Option 2. You cannot use both options.
Step 3: Configure the Page Display Settings
Since the popup will only show when the special link or class is used, set the Page Display Settings to all pages and posts with no exclusions.
Check the box for “Show this popup on which posts/pages?” setting

Step 4: Add your link to a page
Create a new page or navigate to the page you want to add the click to open popup.
Option 1 (recommended): A link point to
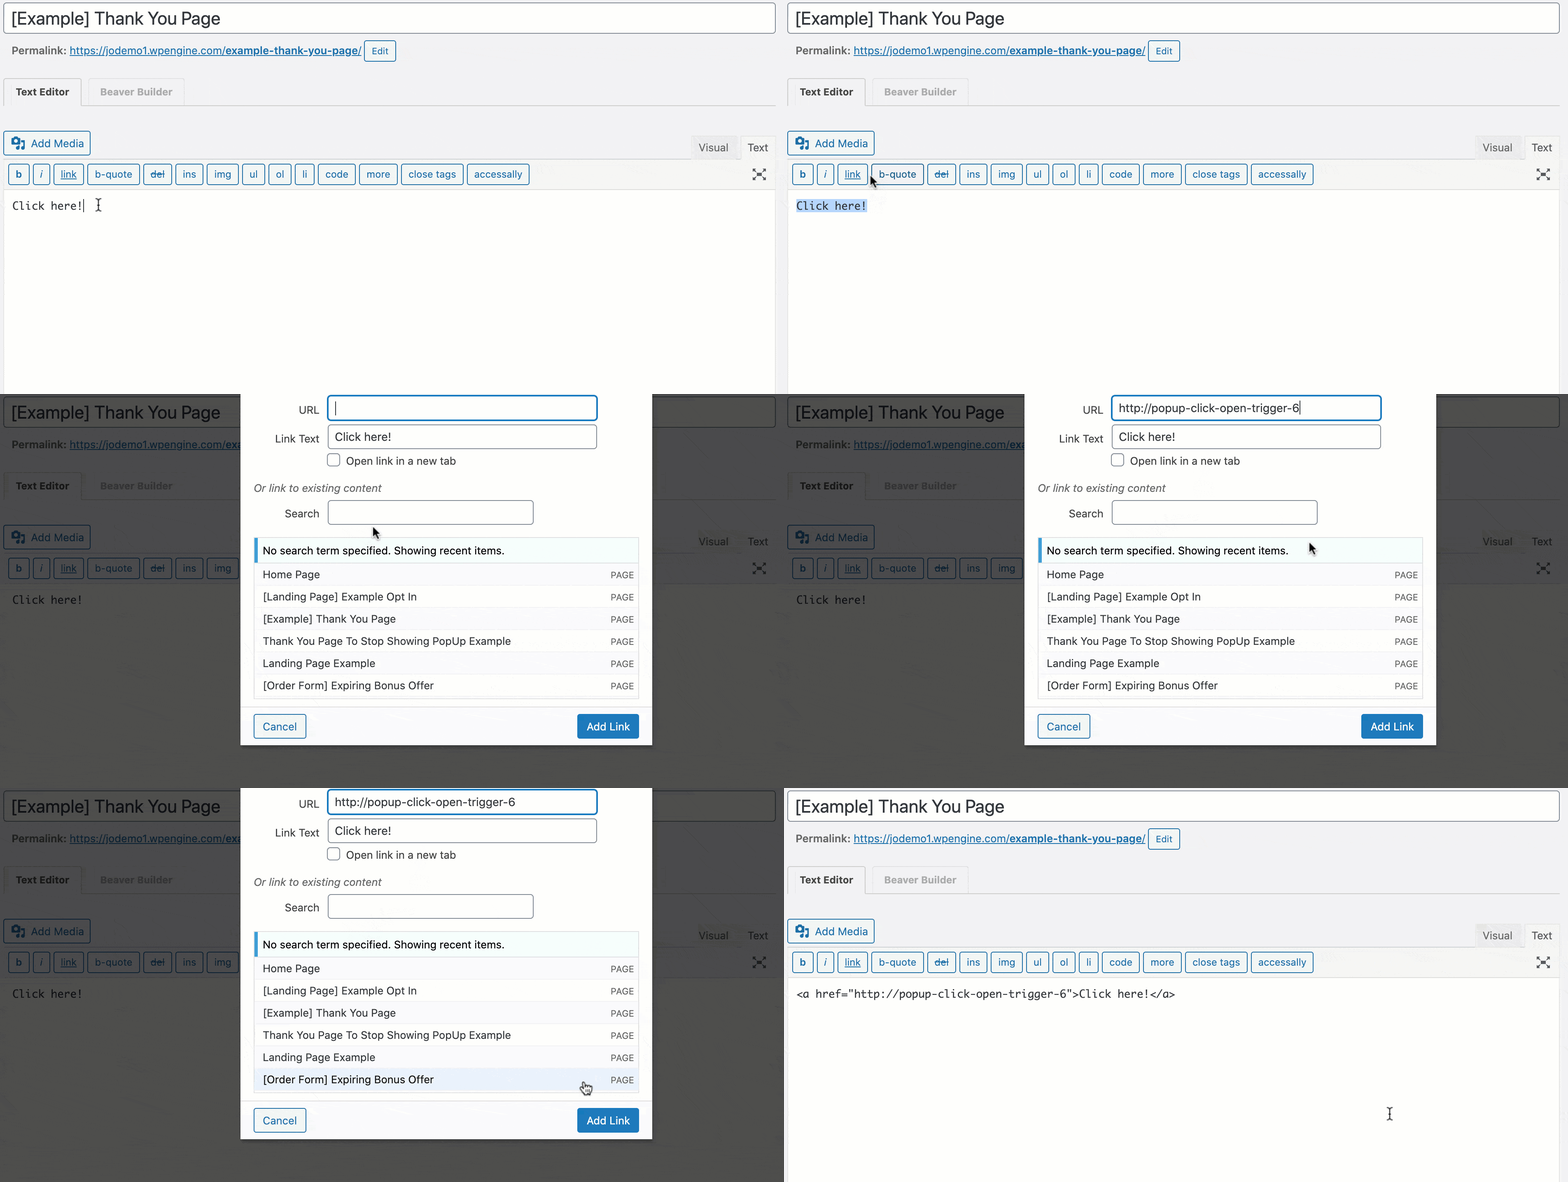
Copy the code from the blue box in Step 2. There are two options for your link: text or image.
Text
- Add the desired copy to your page
- From the text editor, click the link button
- Add the link copied from the blue box for this text
- Publish changes
Image
-
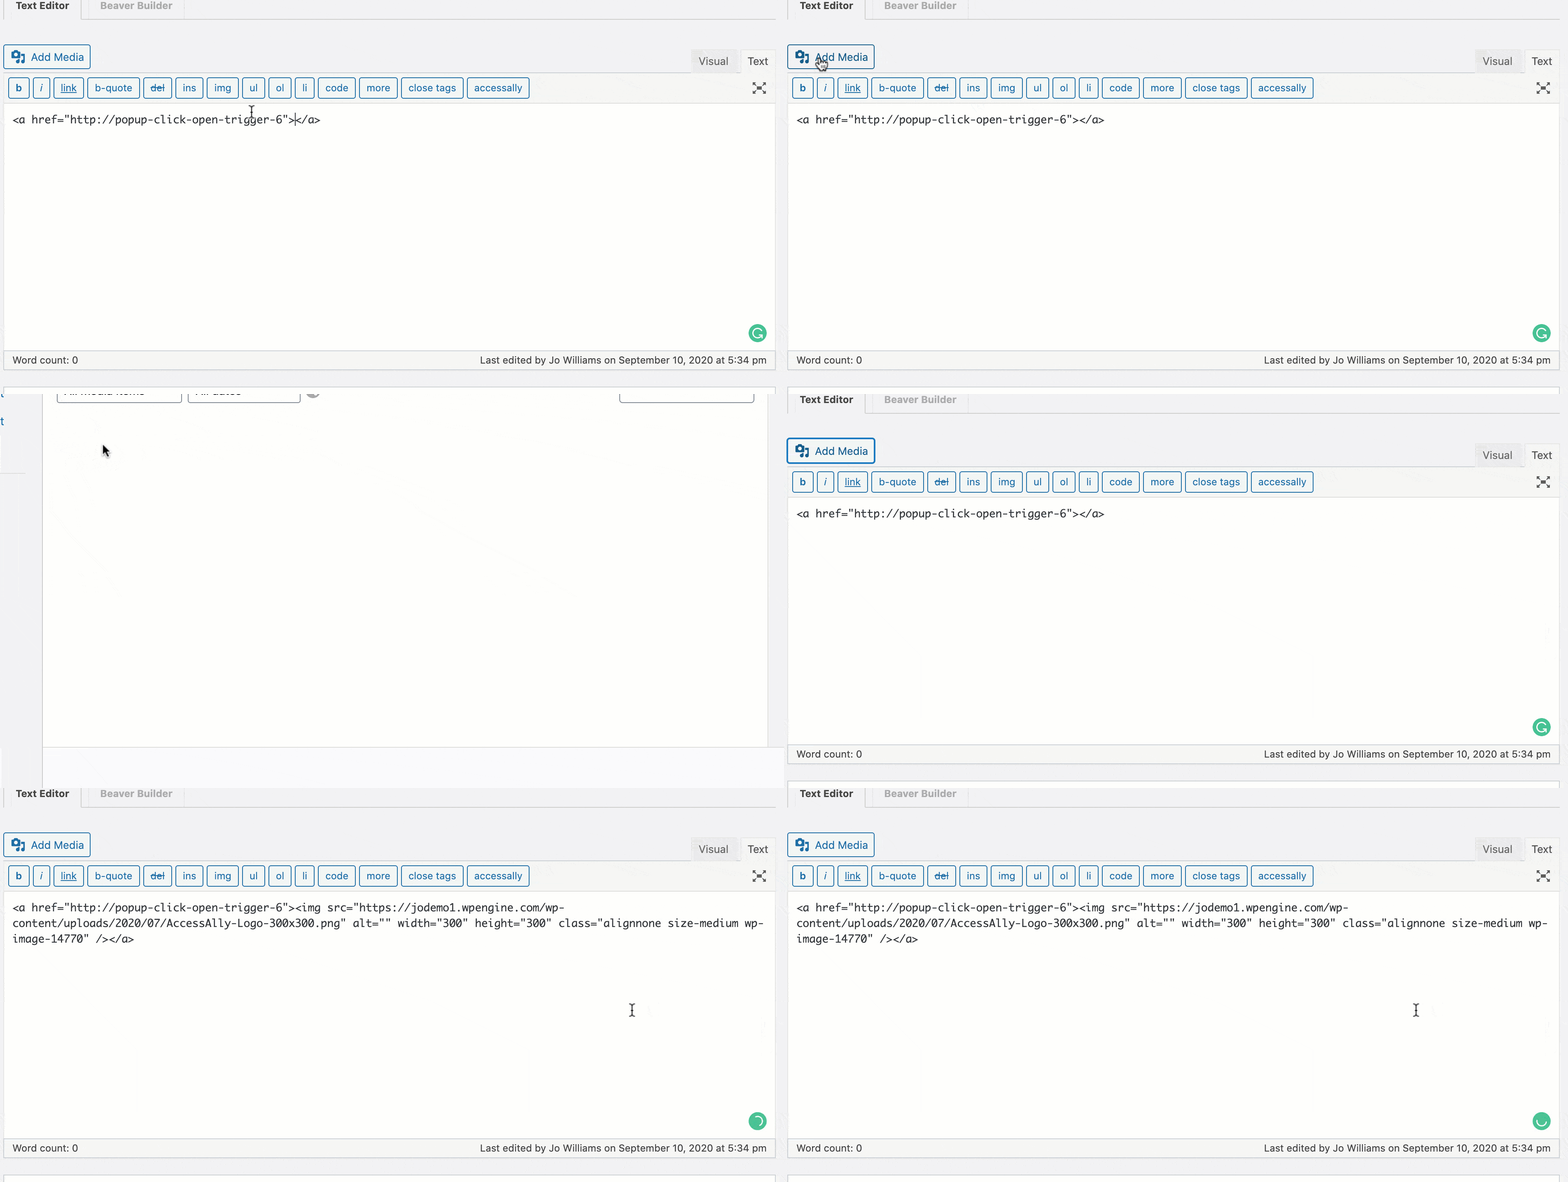
- From the text editor, add the link copied from the blue box to your link box for this image
- Add the desired image to your page from the media library between the link open and close tags
Note: Under the Attachment Display Settings, you must leave the Link To setting set to None
![]()
- Publish changes
Option 2: an element with HTML class
Note: this setting can only be used for linking an image.
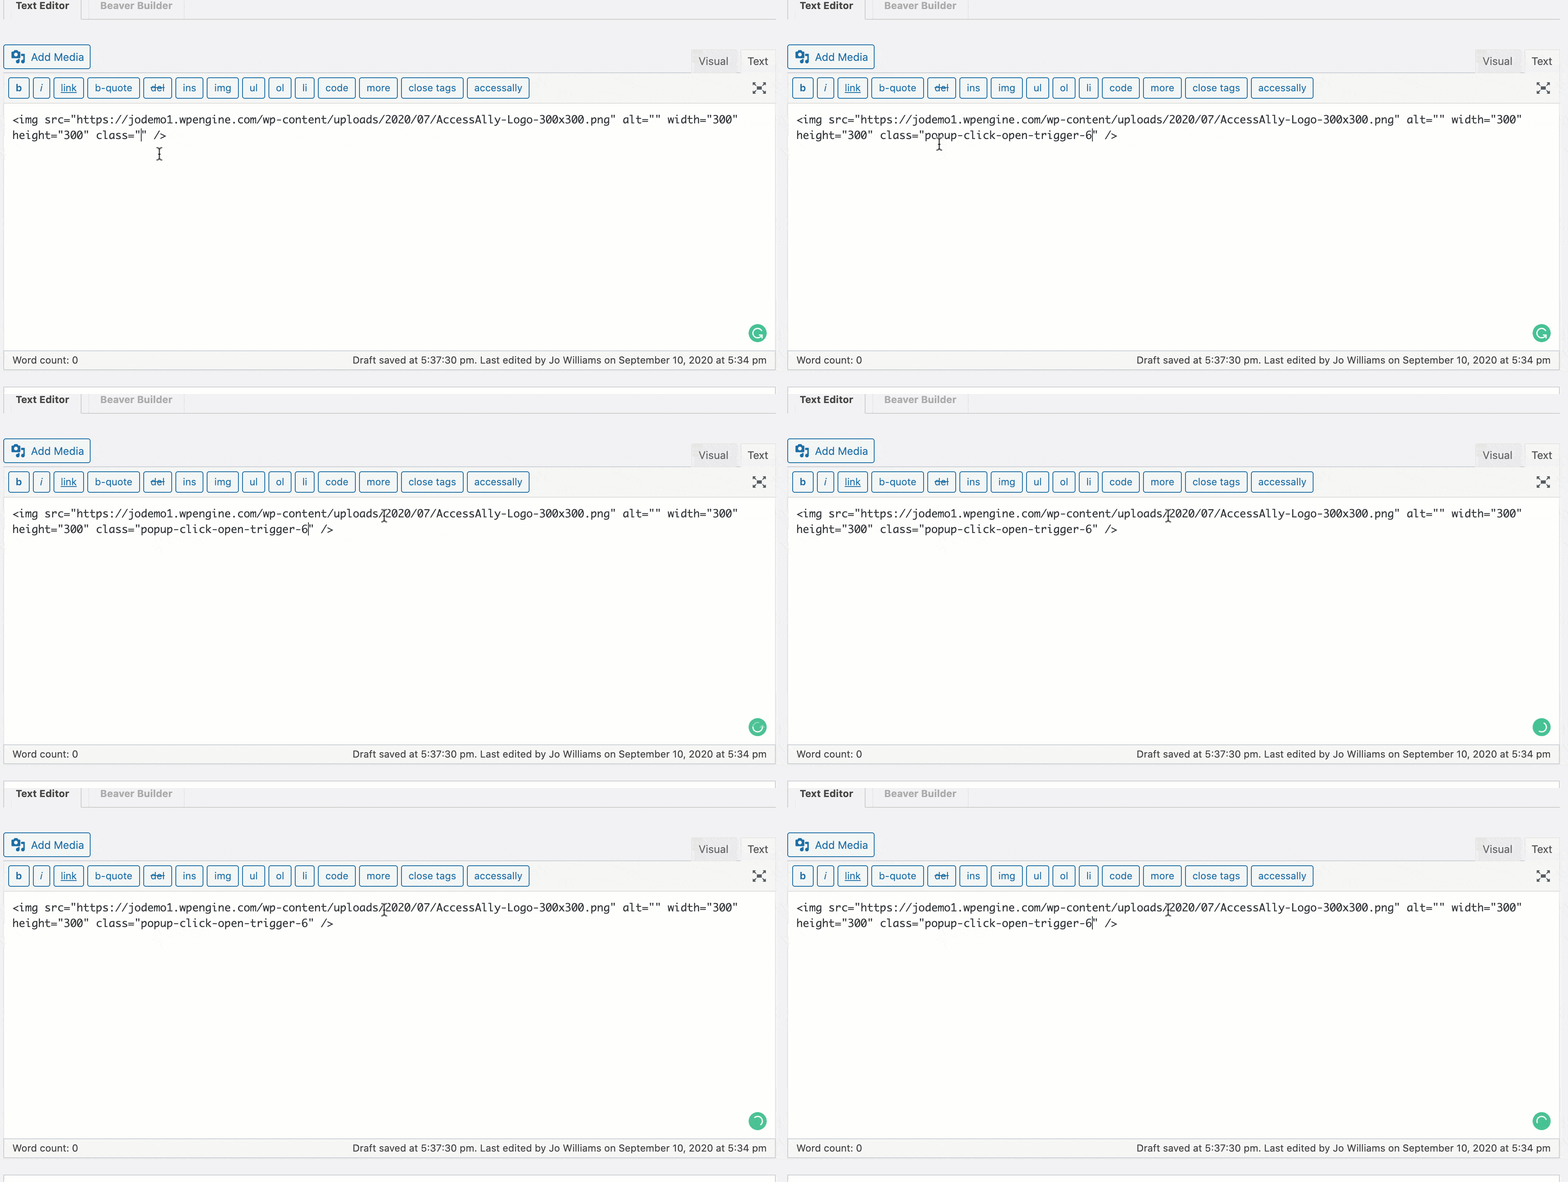
- Add an image from the media library or upload a new image to your page
- Edit the HTML code in the text editor by adding the class copied from the blue box in Step 2
- Publish changes
Test
- View your page on an incognito or private browser.
- Test your text link or image by clicking on it and seeing the popup.
- Be sure to opt-in and test the process all the way through.
Troubleshooting
- If you don’t see the popup, double-check the link you copied from the blue box.
- If you’re using Option 2: an element with HTML class and you don’t see the popup, double-check you’ve pasted the class code in the correct location.
- If you have additional trouble with Option 2: an element with HTML class, try configuring the click to popup setting using Option 1.
- Always test on an incognito or private browser.
Want to create a click-to-open popup that is triggered when someone clicks on an image? See this tutorial: How to Create a Click-to-Open Popup (Image-trigger).