How to Use Embedded Opt-in Form
An embedded opt-in form is useful when you create landing pages on your site. You can use these embedded opt-ins on any page of your website and have the design power you’re used to within PopupAlly Pro.
PopupAlly works with your website and can replace more expensive platforms like LeadPages.
Written Tutorial
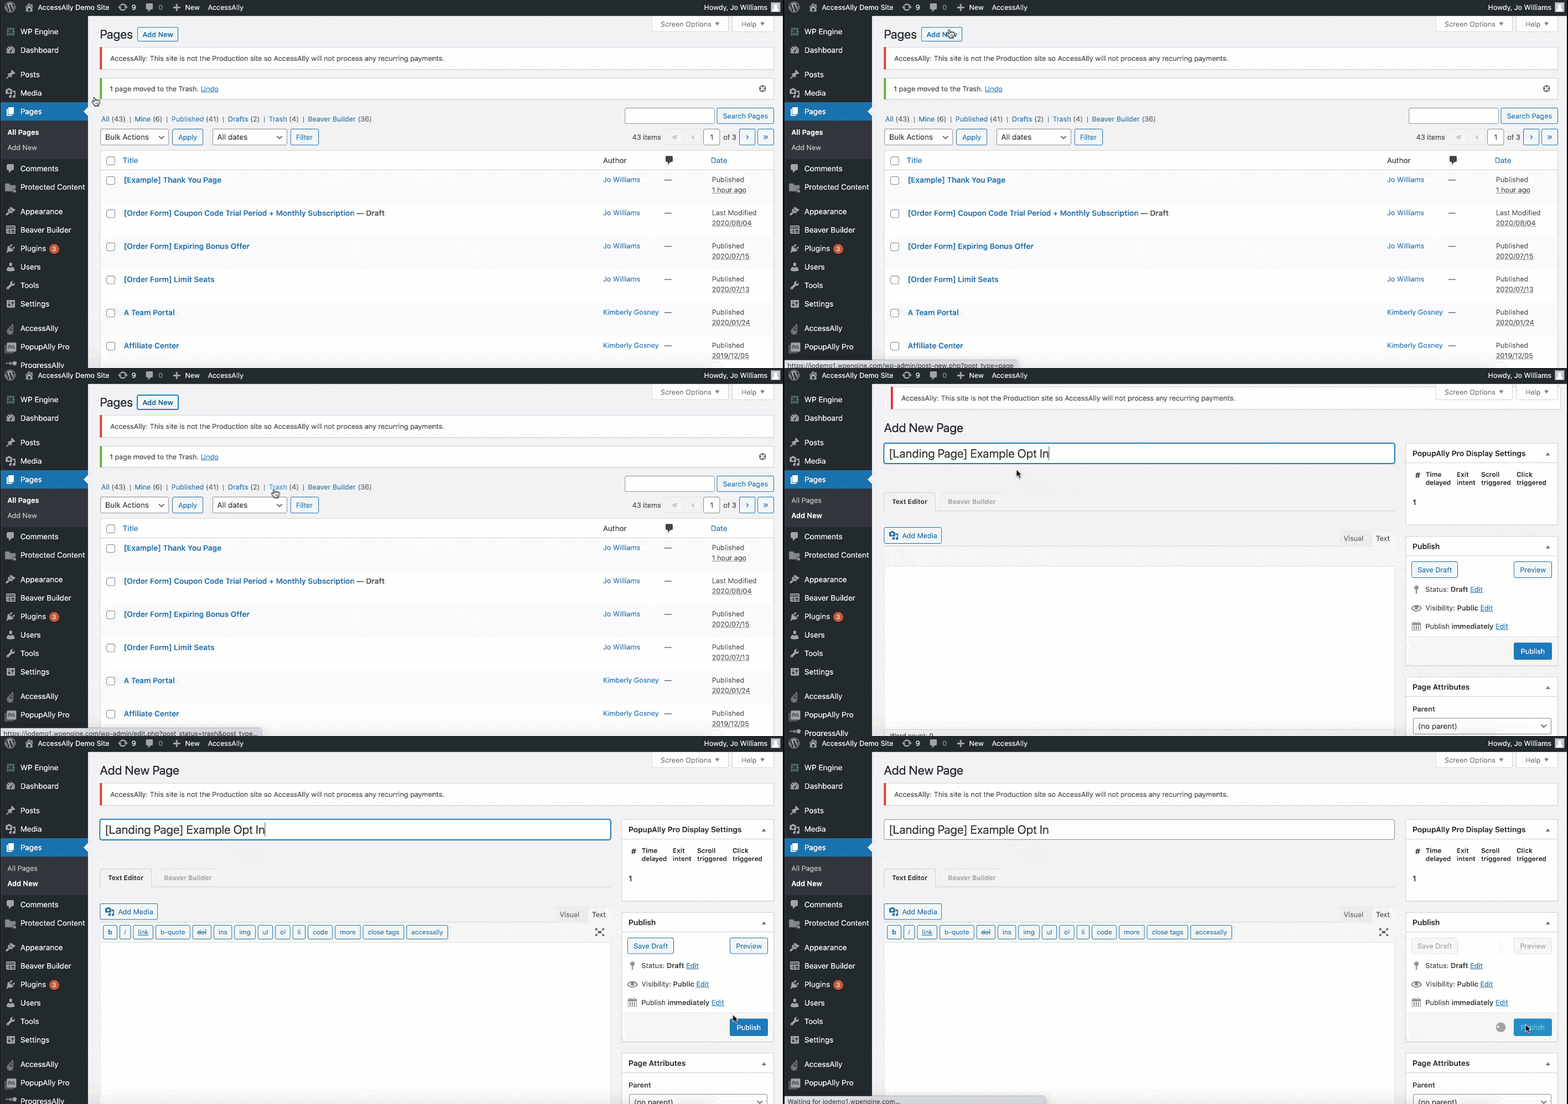
Step 1: Create a new WordPress page
Your opt-in landing page will be a regular WordPress page. Create a new page in WordPress, add a title, then publish the page.

Step 2: Create an opt-in form
In your PopupAlly settings, create a new opt in form. Configure the look and feel of the opt in using the Style Settings tab.
The only required style settings are for your input fields and submit button.With an embedded opt-in, the sizing can be important to fit within your layout and page design.
All other styling is optional, and step by step instructions can be found here on how to configure these settings.
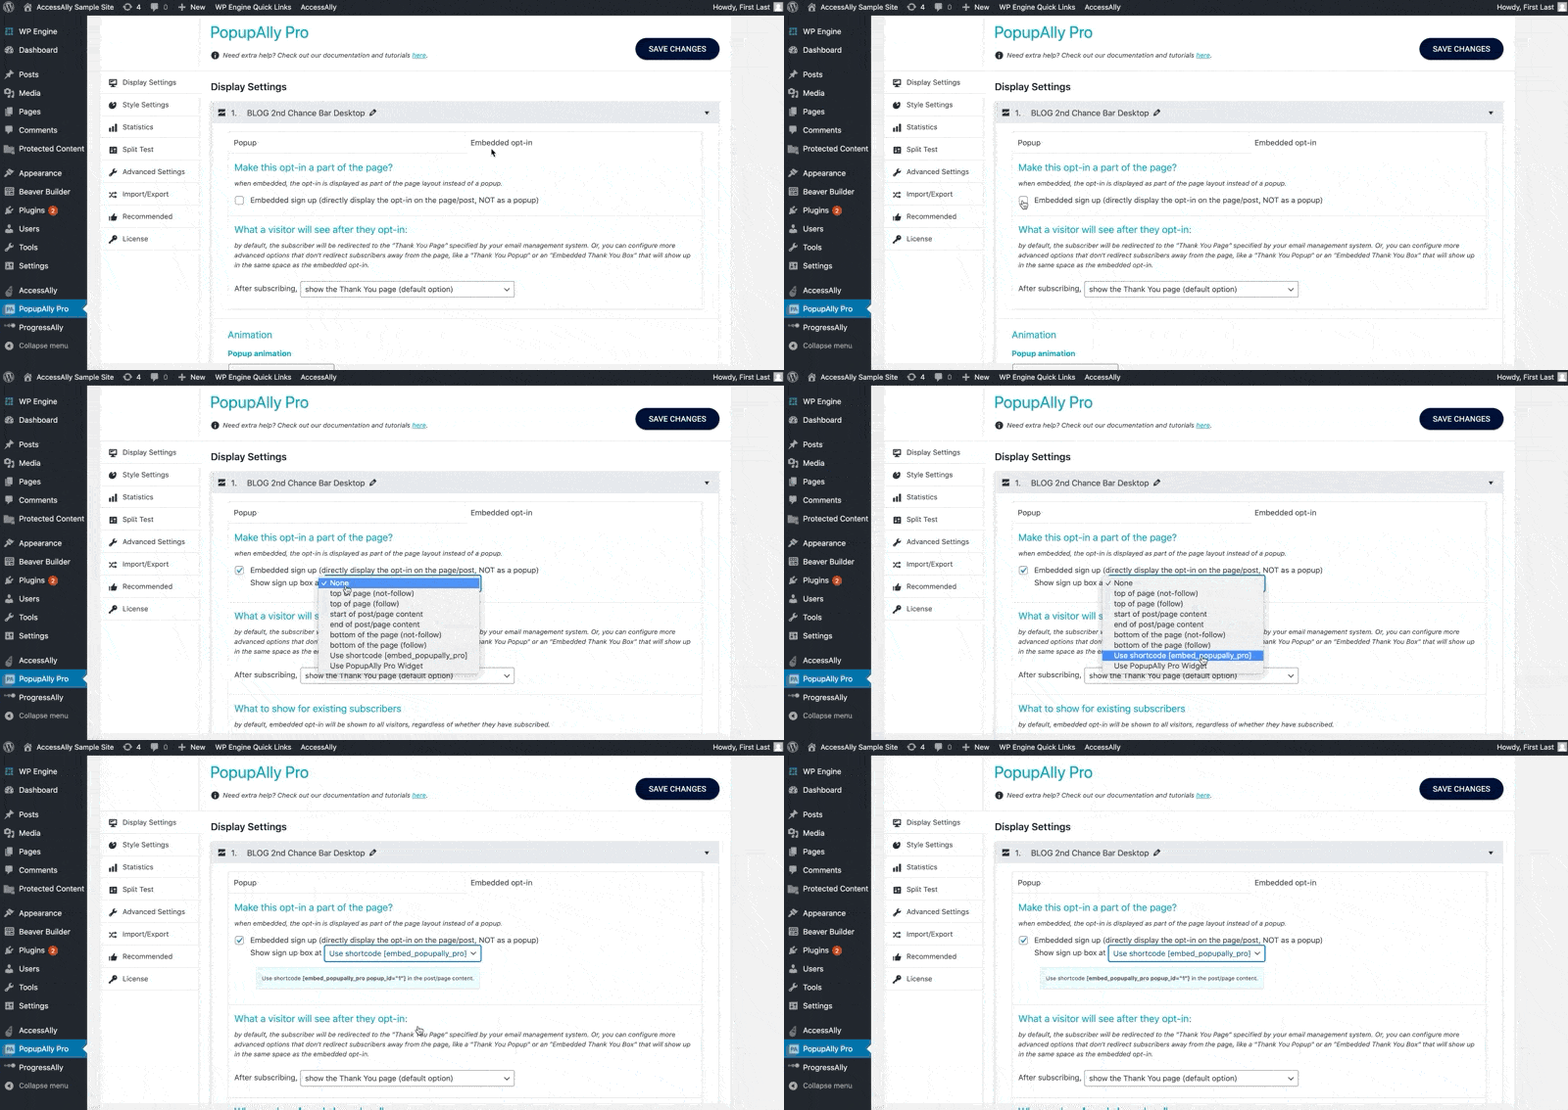
In the Display Settings, make sure the opt in type is set to Embedded opt-in > Shortcode.

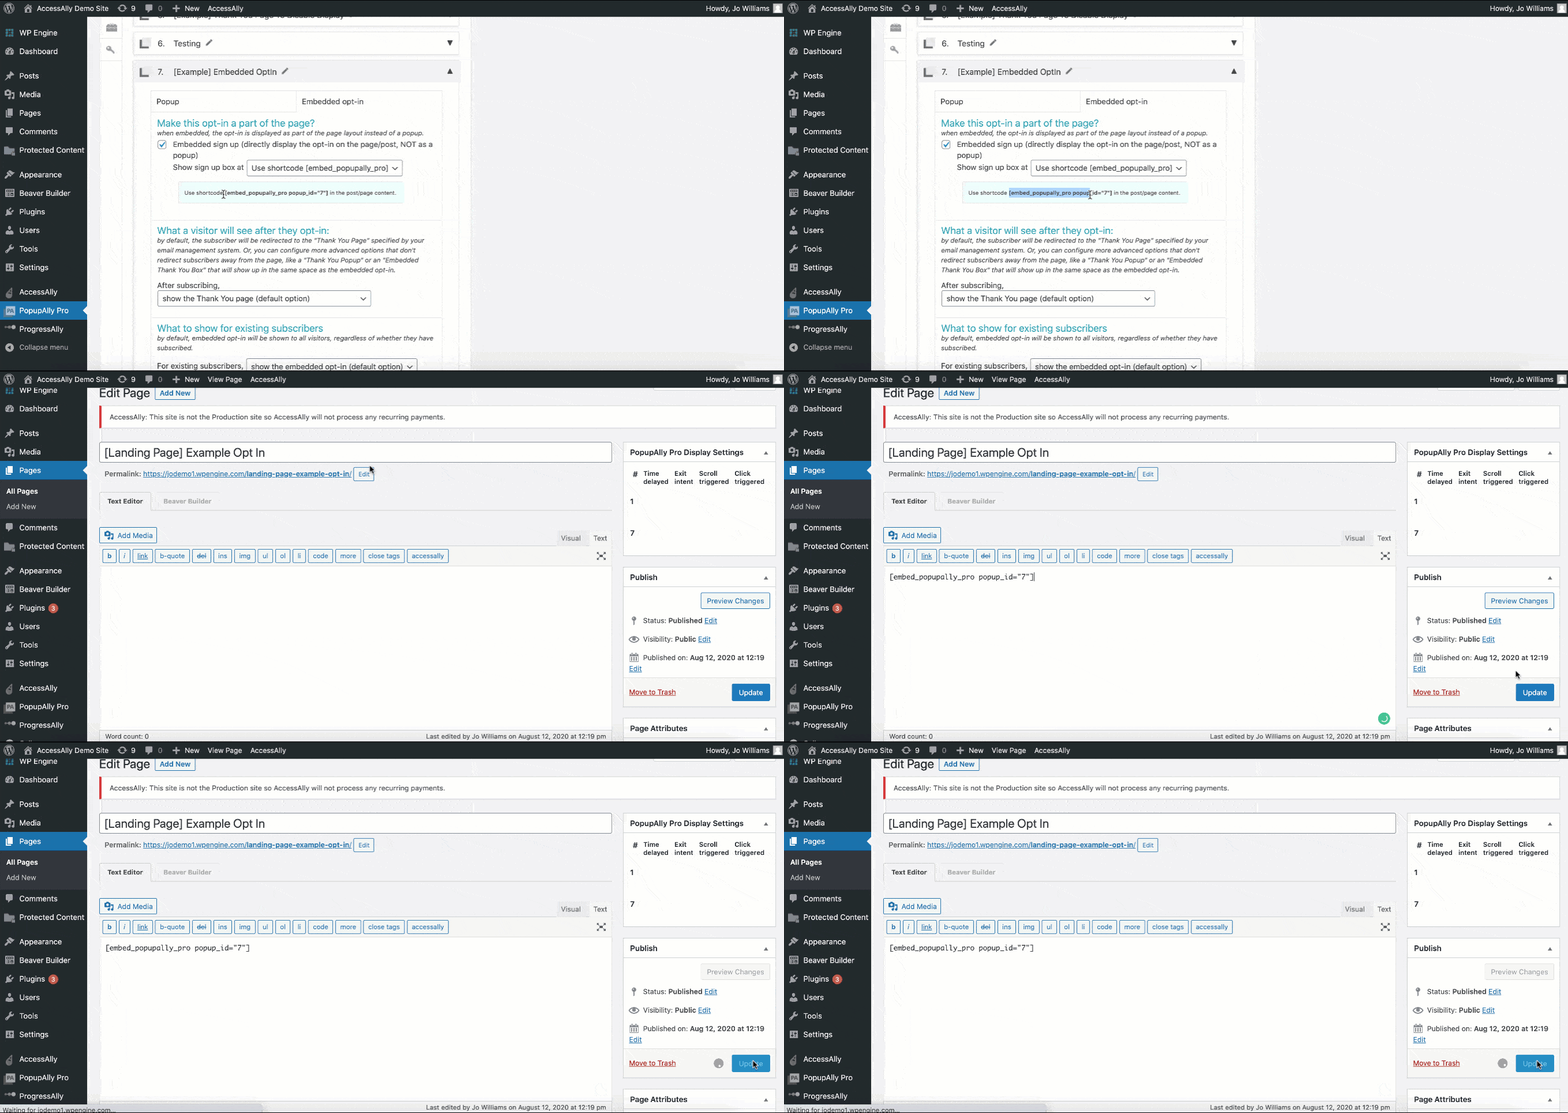
Copy the shortcode displayed in the light blue box & add this to your WordPress page content.
Click Save Changes.
Step 4: Add the pop up to your page
Paste the copied shortcode from the light blue box mentioned in Step 3 and update your page.

Test
Step 1: Test opt-in on an incognito window.
Step 2: Check your CRM to make sure appropriate tags were applied and/or emails were sent