PopupAlly + Mad Mimi work great together! This short tutorial will walk you through how to grab the MadMimi form code for your website opt-in.
Then, add this code, directly into your PopupAlly settings in WordPress.
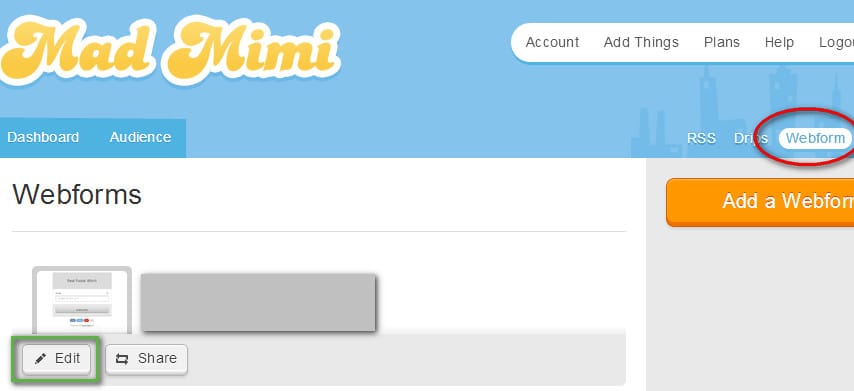
1. Under ‘Webform’ settings, select the webform
Once you log into your Mad Mimi account, you’ll want to begin setting up your Mad Mimi opt in form by heading to Webforms > Webform.

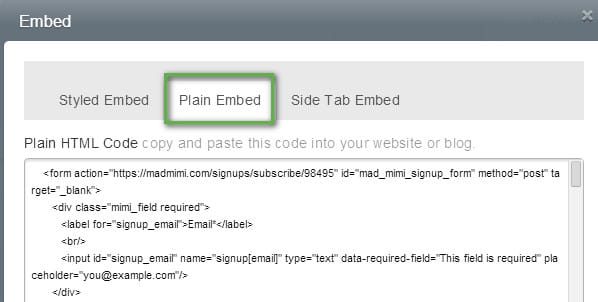
2. Click on the ‘Embed’ button
Then, click on the “Embed” button to reveal the HTML code that will be used to integrate Mad Mimi with your WordPress site.

3. Use the ‘Plain Embed’ code

Each popup or opt-in inside PopupAlly can be connected to its own list, so if you’re using different sign up forms throughout your website but want them all to lead to this particular list, feel free to use the same HTML code in each of the individual popup settings.
Make sure to get all of the code!
4. Link to Thank You Page
Now that you’ve integrated the Mad Mimi sign up form with your PopupAlly WordPress plugin, you will want to make sure that whoever fills out the sign up form or popup will be sent to the right Thank You page on your website.
In Mad Mimi:
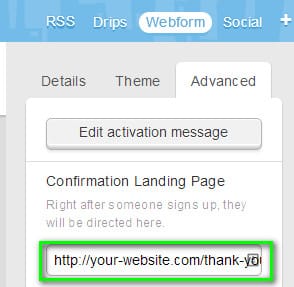
- Go to the Advanced tab
- Enter the Thank You page URL for ‘Confirmation Landing Page’

5. Paste Code in PopupAlly
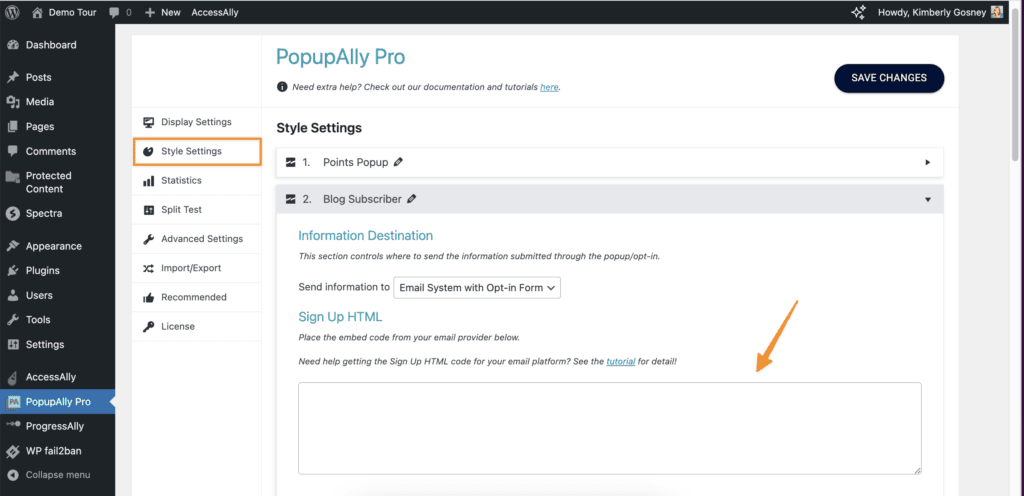
Go to PopupAlly > Style Settings, open your desired popup. In “Send information to” dropdown select Email System with Opt-in Form.
Paste your HTML code in the “Sign Up HTML” section.

6. Save Your Changes
After saving your changes in PopupAlly, your new opt-in is now connected to Mad Mimi.