If it’s required, no one will be able to submit the opt-in form without also agreeing to your marketing / GDPR-related terms.
We recommend that you make the checkbox “required” on all of your opt-in forms.
However, because we are committed to your flexibility, know that it is possible to track whether or not someone ticks an optional checkbox on your opt-in forms.
This is not possible for all email marketing systems, and is not the recommended route for GDPR compliance. If you are using an optional checkbox, please make sure to consult with a lawyer for legal advice.
Step 1: Build Your Opt-in Form in Your Email Marketing Service
First, build the opt-in form as you normally would inside your CRM.
Then, review the documentation from your system to make sure the checkbox has been added to the form properly and is being tracked.
If you’re not sure where to find the documentation, check on your system below:
ActiveCampaign
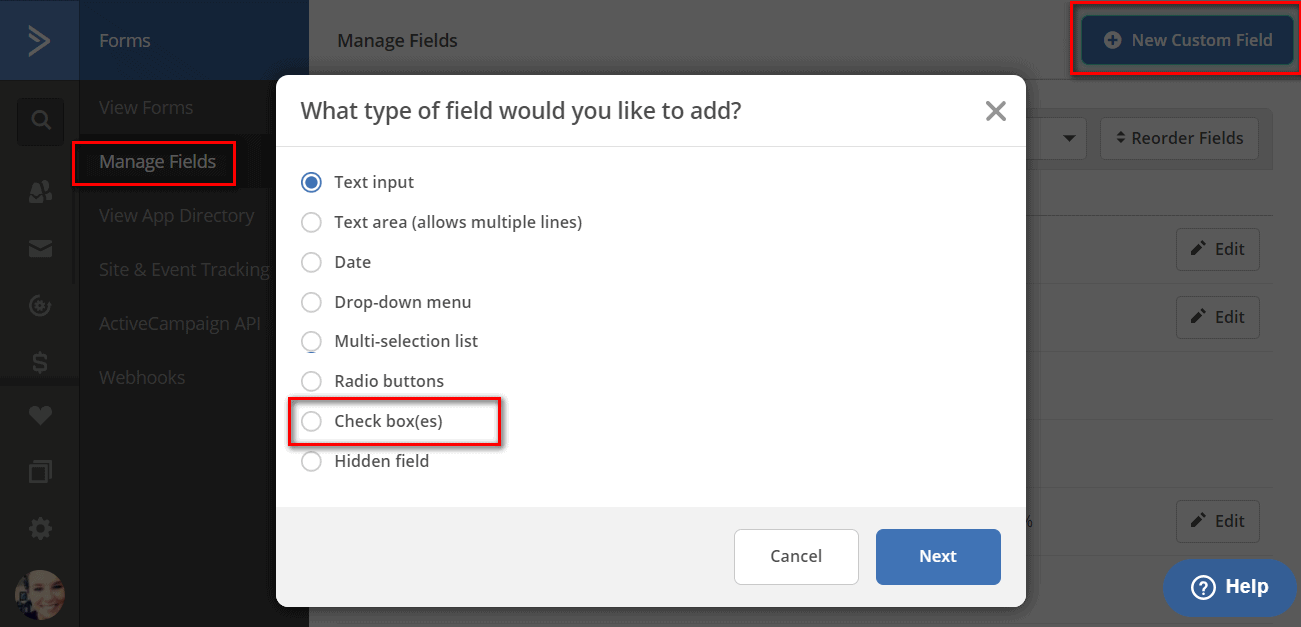
When building your opt-in forms in ActiveCampaign, make sure to add a new field (checkbox) that will be dedicated to your GDPR consent:
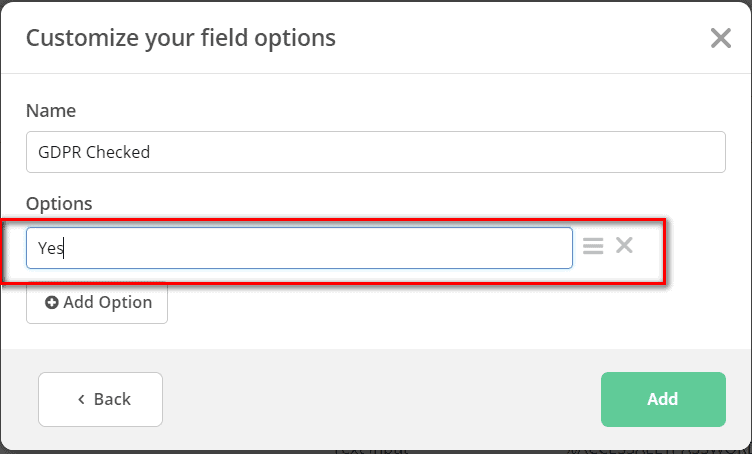
As you’re customizing the checkbox field, you can label it “GDPR”. Under Options, write “Yes”. (This will make it easier to see at a glance who checked it, if you need to at a later date)
Lastly, make sure the Checkbox field has been added to your opt-in form.
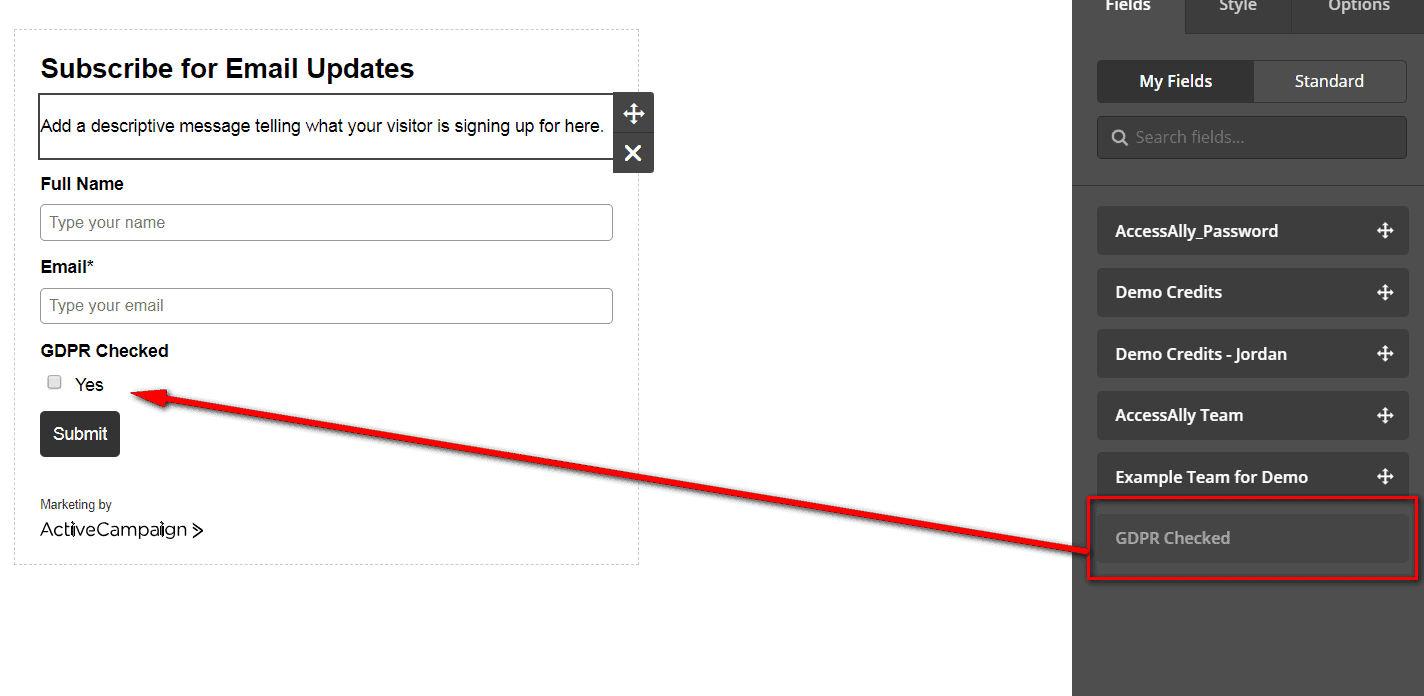
As always, make sure you save!
ConvertKit
Currently, you must use custom coding to add a checkbox to your opt-in form.
ConvertKit outlines the reasons why in this article.
The article also gives a solution for obtaining consent for existing subscribers, so please read it carefully.
Once again, if your PopupAlly Pro opt-in form has a required checkbox, you do not need to deal with custom coding: all new contacts must have agreed to your terms.
Drip
To add a checkbox to your Drip form, you’ll have to add a “snippet” to the embedded HTML code. Please follow this tutorial.
Once again, if your PopupAlly Pro opt-in form has a required checkbox, you do not need to deal with custom coding: all new contacts must have agreed to your terms.
Infusionsoft / Keap
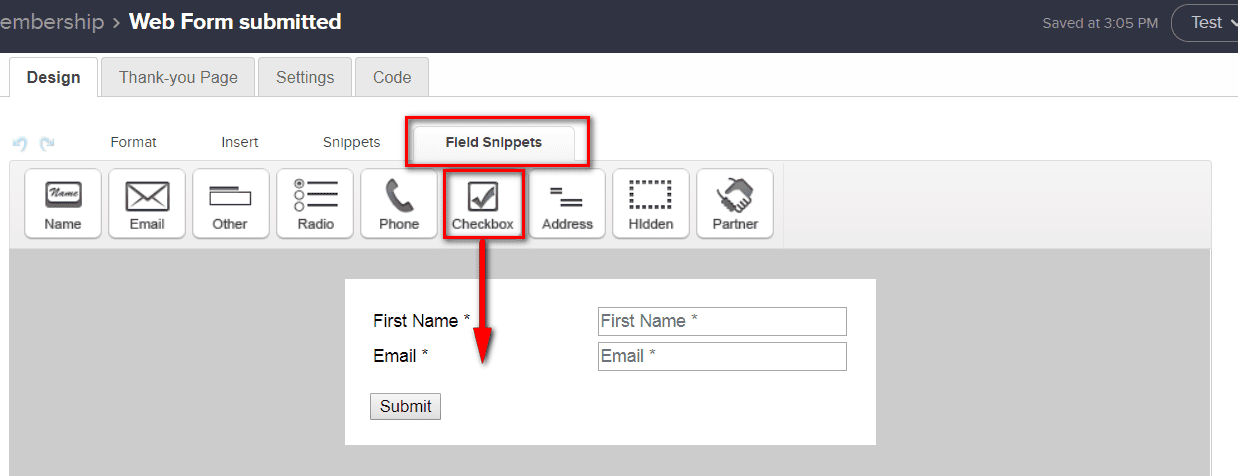
As you’re setting up your Infusionsoft/Keap form, add a checkbox by going to: Field Snippets > Checkboxes.
In the checkbox settings, name the Label something easy to remember, like “GDPR”. Then, click on the tag button.
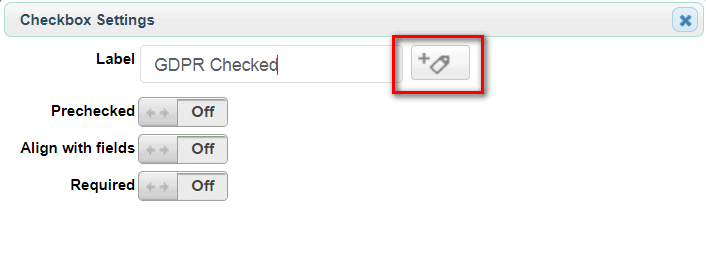
Here, you can decide what tag should be added if they check the box. Once again, it will be helpful if the tag is named something similar to GDPR.
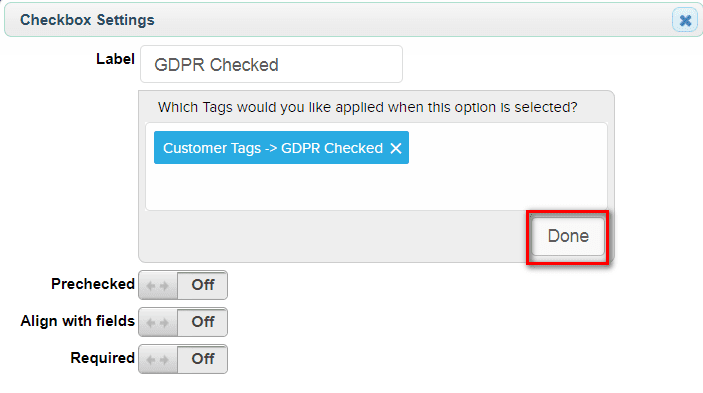
Once the tag is set up, a number will show up next to the tag icon.
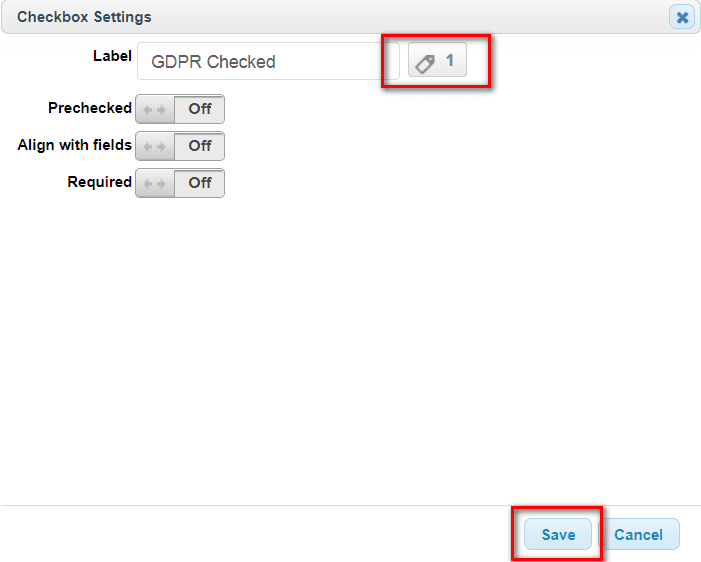
Finally, hit “save” and “publish” the campaign BEFORE you grab the HTML to add to the PopupAlly Pro opt-in.
This is important, since the HTML code on the “Code” tab will only update after the campaign has been published.
Ontraport
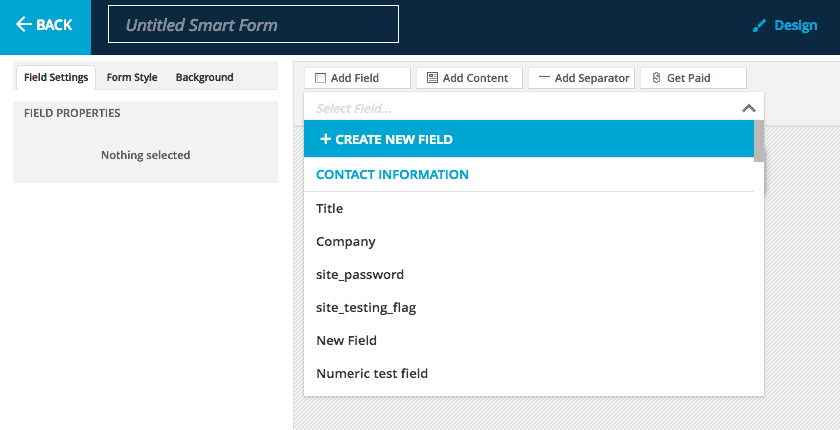
When creating your smart form in ONtraport, make sure to click on Add a New Field > Create New Field
When setting up this new field, make sure to select the Checkbox type. Choose a descriptive, easy-to-remember name, like “GDPR”.
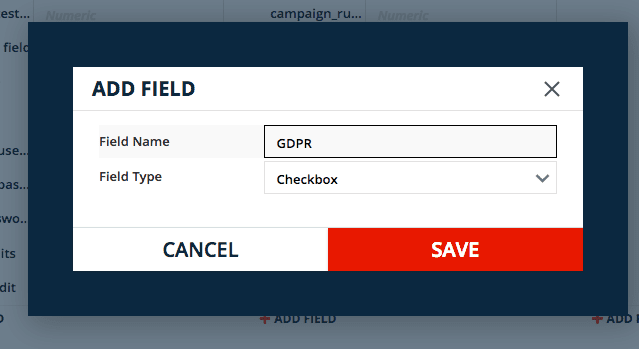
Then, click save.
Back inside your form settings, add the new field to the form.
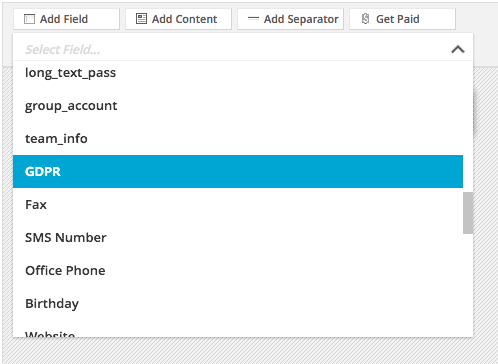
When added, the form will look like this:
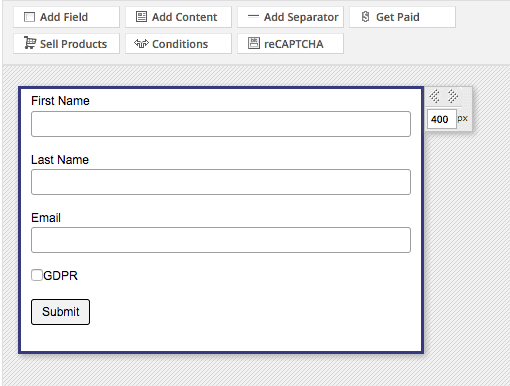
As always, click save.
Step 2: Grab the HTML for the Form
See our integration articles, to select your email marketing service, and get your HTML code.
Step 3: Connect the Checkbox To Your Custom Field
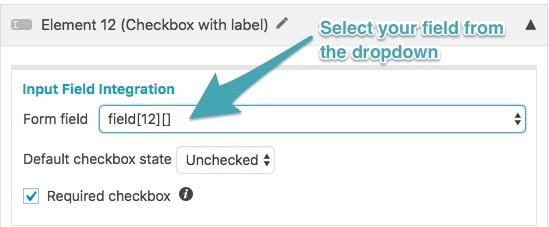
When you add the checkbox to your opt-in form, there’s an option to connect it with the new field you added in Step 1 of this tutorial.
Step 4: Test
Once you’re finished, test the opt-in.
If it has been configured successfully, you will see a new GDPR field under the contact that is marked “Yes” based on whether they agreed to your terms or not.