You can use a thank you page to permanently disable showing a pop up opt-in for people that have already subscribed.
This can be a great feature to ensure you’re always using popup opt-ins politely.
Video Tutorial to Disable Popups
Written Tutorial
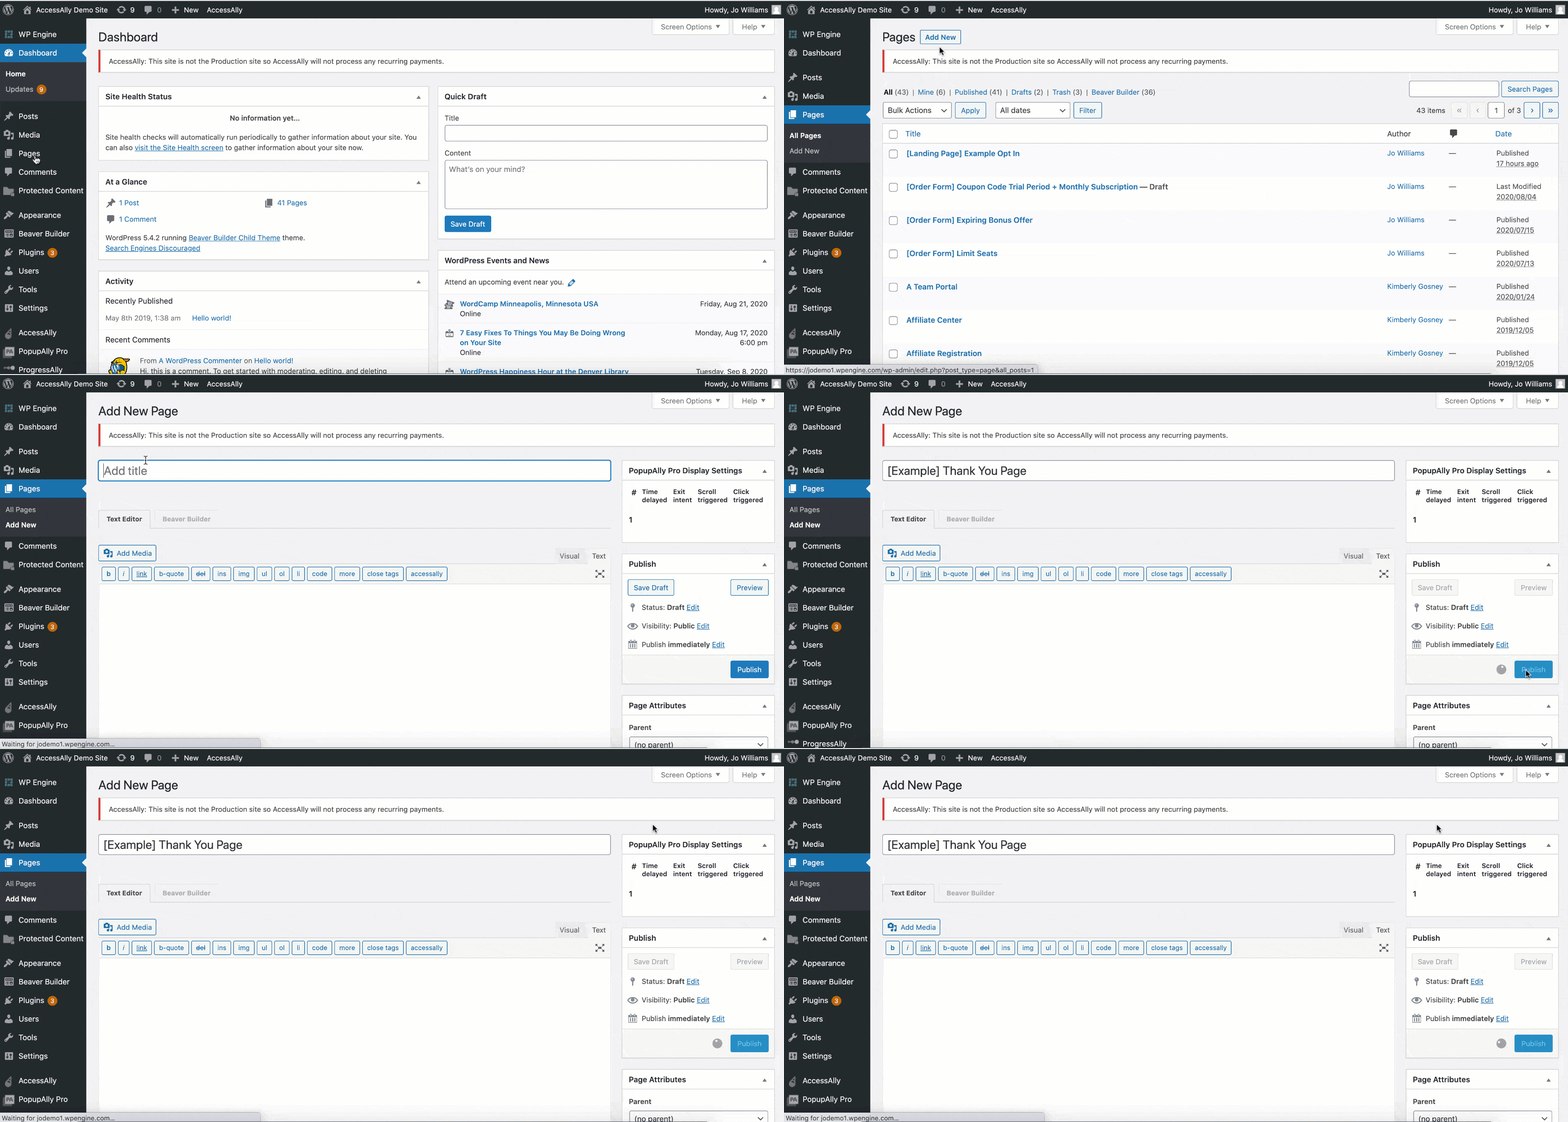
Step 1: Create New Thank You Page
Create and publish a new WordPress Page.

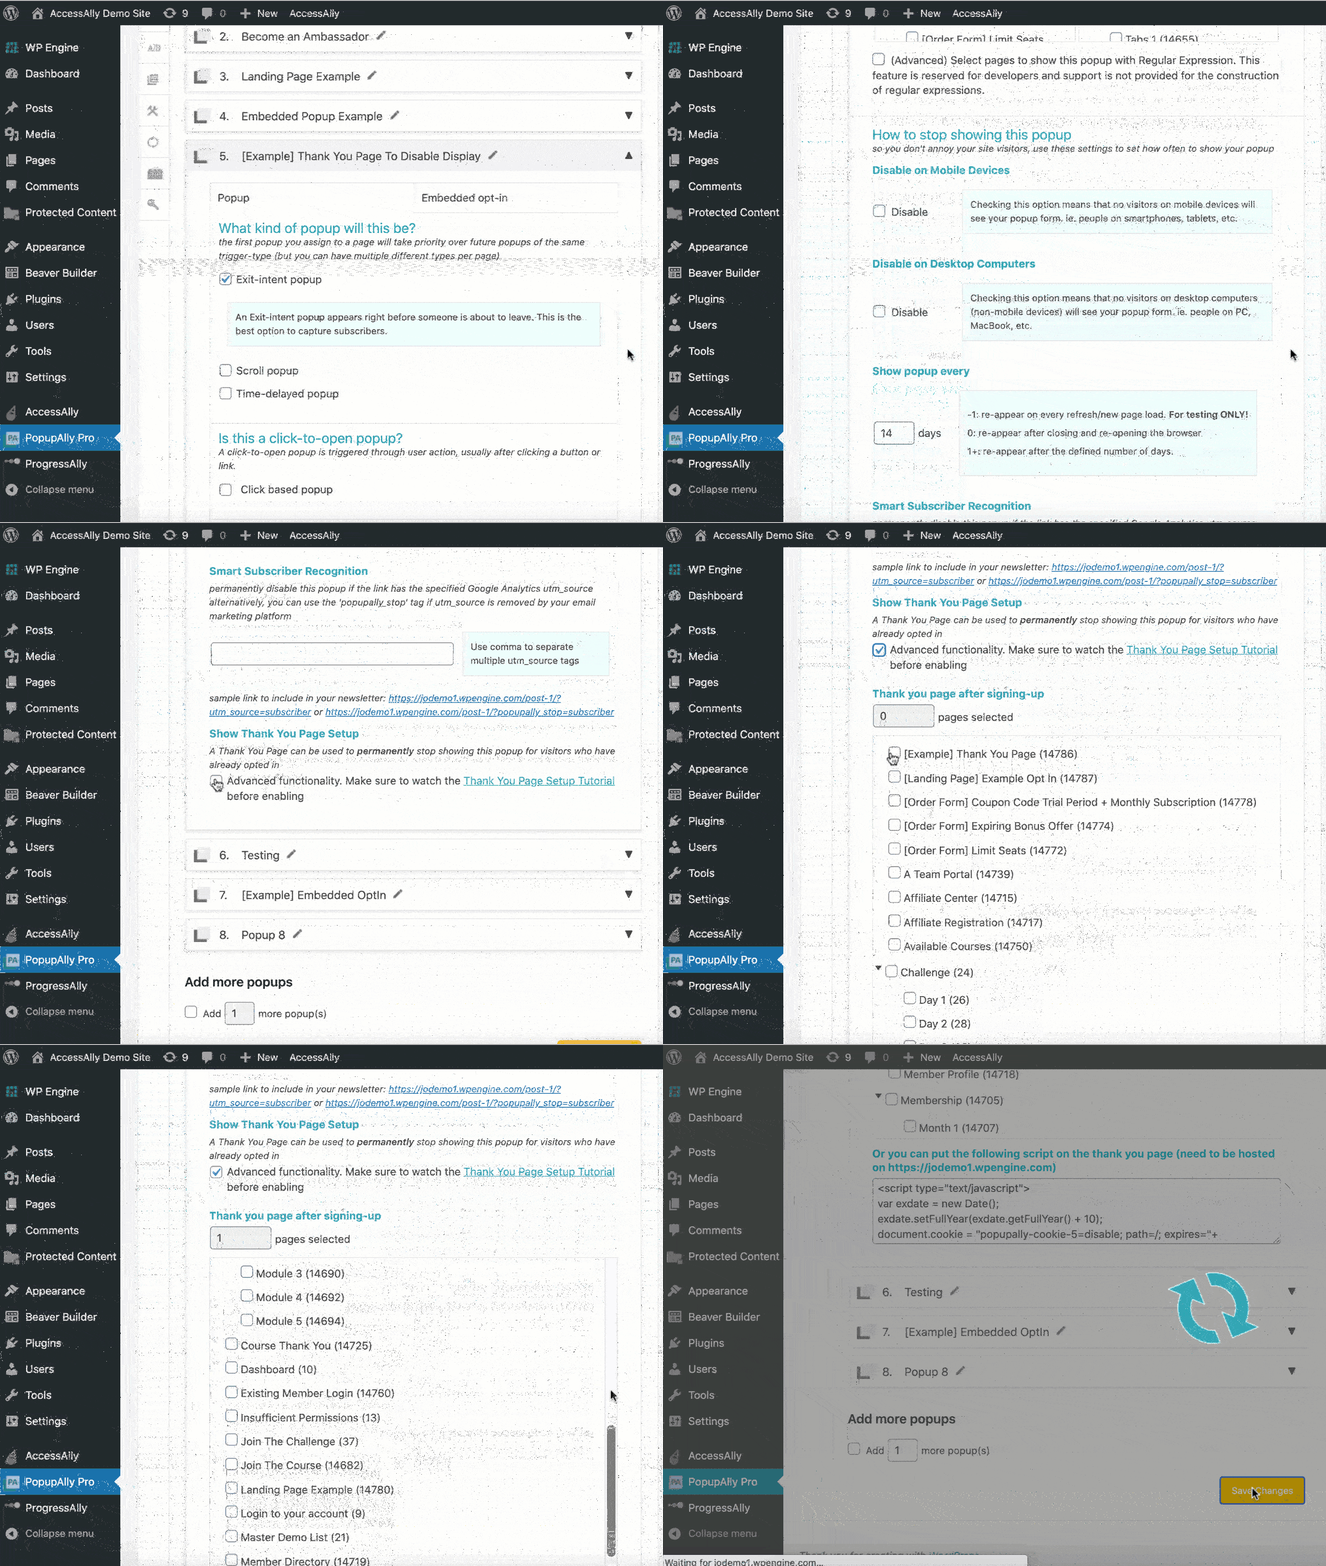
Step 2: Configure Your Popup
If you haven’t yet, create your PopupAlly opt-in form.
Note: You must select the type of popup (either Exit-intent popup, Scroll popup, Time-delayed popup) or an Embedded sign up in order to see the setting options in the next step.
Step 3: Thank You Page Settings
In the Display Settings tab, locate your popup.
In the Show Thank You Page Setup area, check the Advanced functionality checkbox.
Select the thank you page that you created in Step 1.
Click the yellow Save Changes button.

Step 4: Designate Thank You Page in Email Marketing System
Now, it’s time to link the thank you page up with your email marketing system’s process.
Note: This is an important step, to make sure all opt-ins are properly tracked and redirected to your thank you page so you don’t lose subscribers.
Click here for tutorials on doing that for your email platform:
- Mailchimp: setting a thank you page
- ConvertKit thank you pages
- ActiveCampaign confirmation page
- Drip confirmation page settings
- Ontraport custom thank you pages
- Keap custom thank you pages
- Aweber thank you page settings
Important
Although PopupAlly Pro gives you the option of showing a “thank you popup” after someone opts in, Mailchimp, ConvertKit and Aweber APIs block those new subscribers. Instead, please make sure to use a thank you page as described here to make sure you don’t lose any subscribers.
Testing
Test the opt-in by opting in.
Check to make sure you see the correct thank you page.