PopupAlly Pro allows you to create versatile, fully-customizable popups and opt-ins for your website.
1. Create a new PopupAlly form
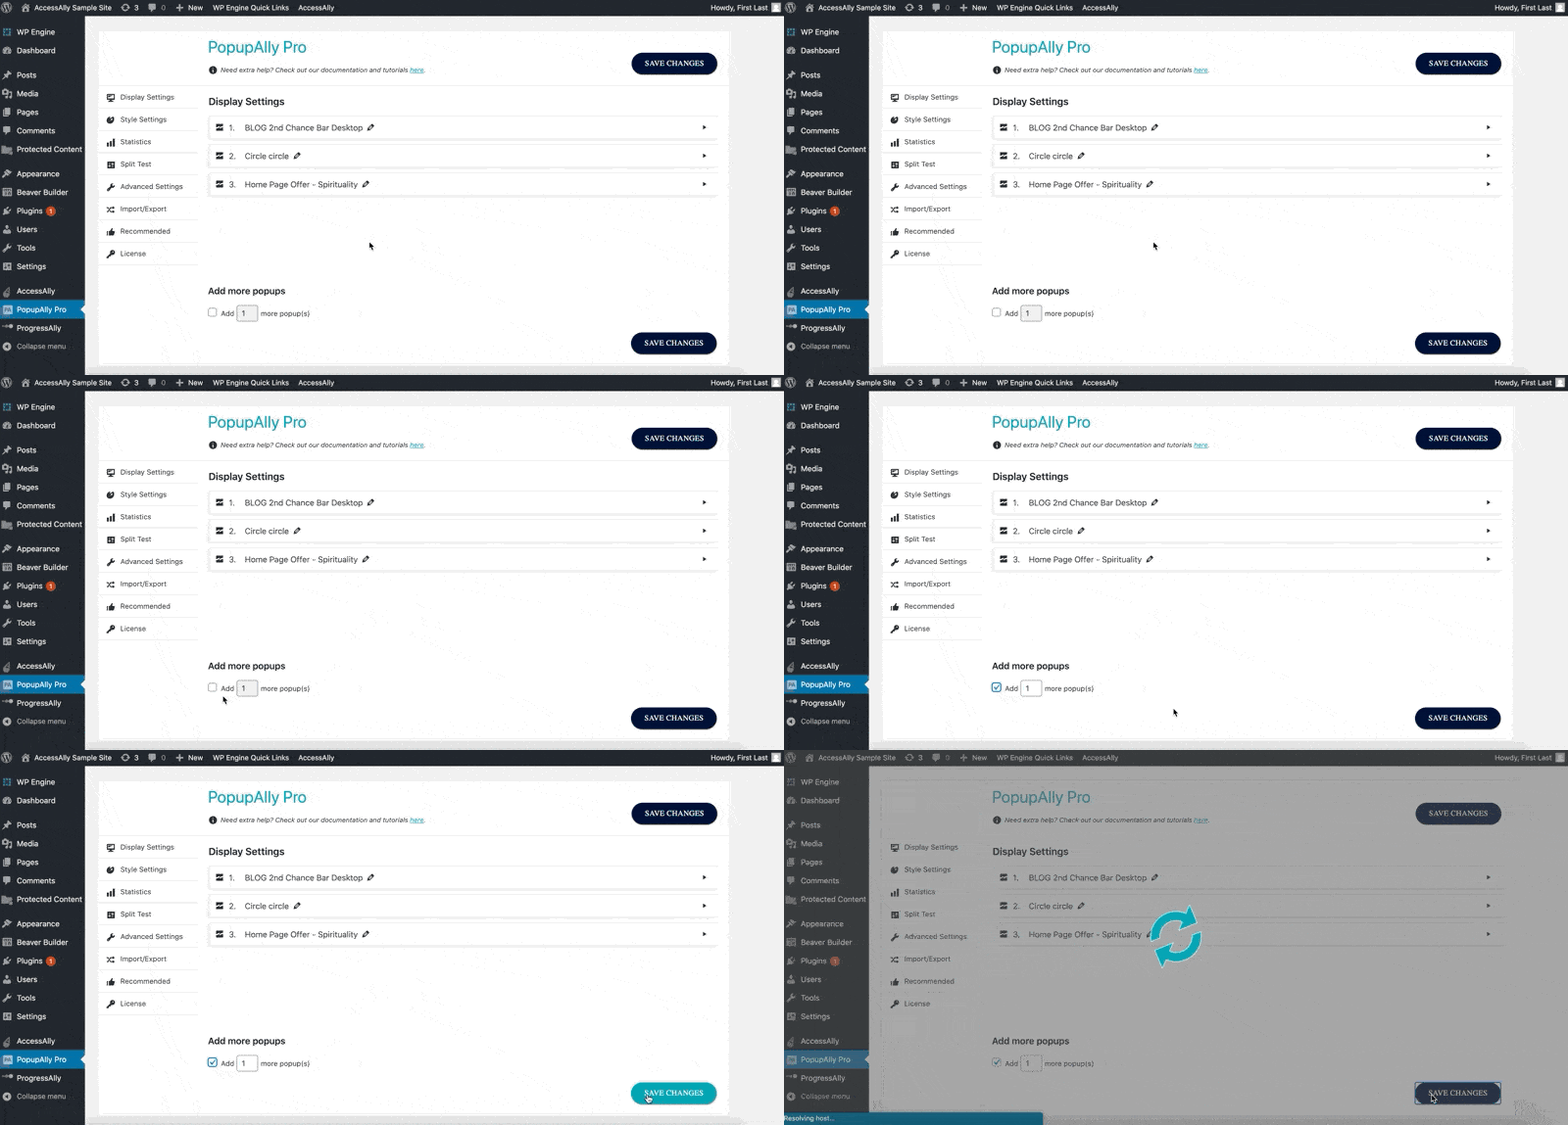
In your WordPress site, go to PopupAlly > Display Settings.
Here, check the box Add More Popups and click Save Changes.

2. Choose the kind of popup
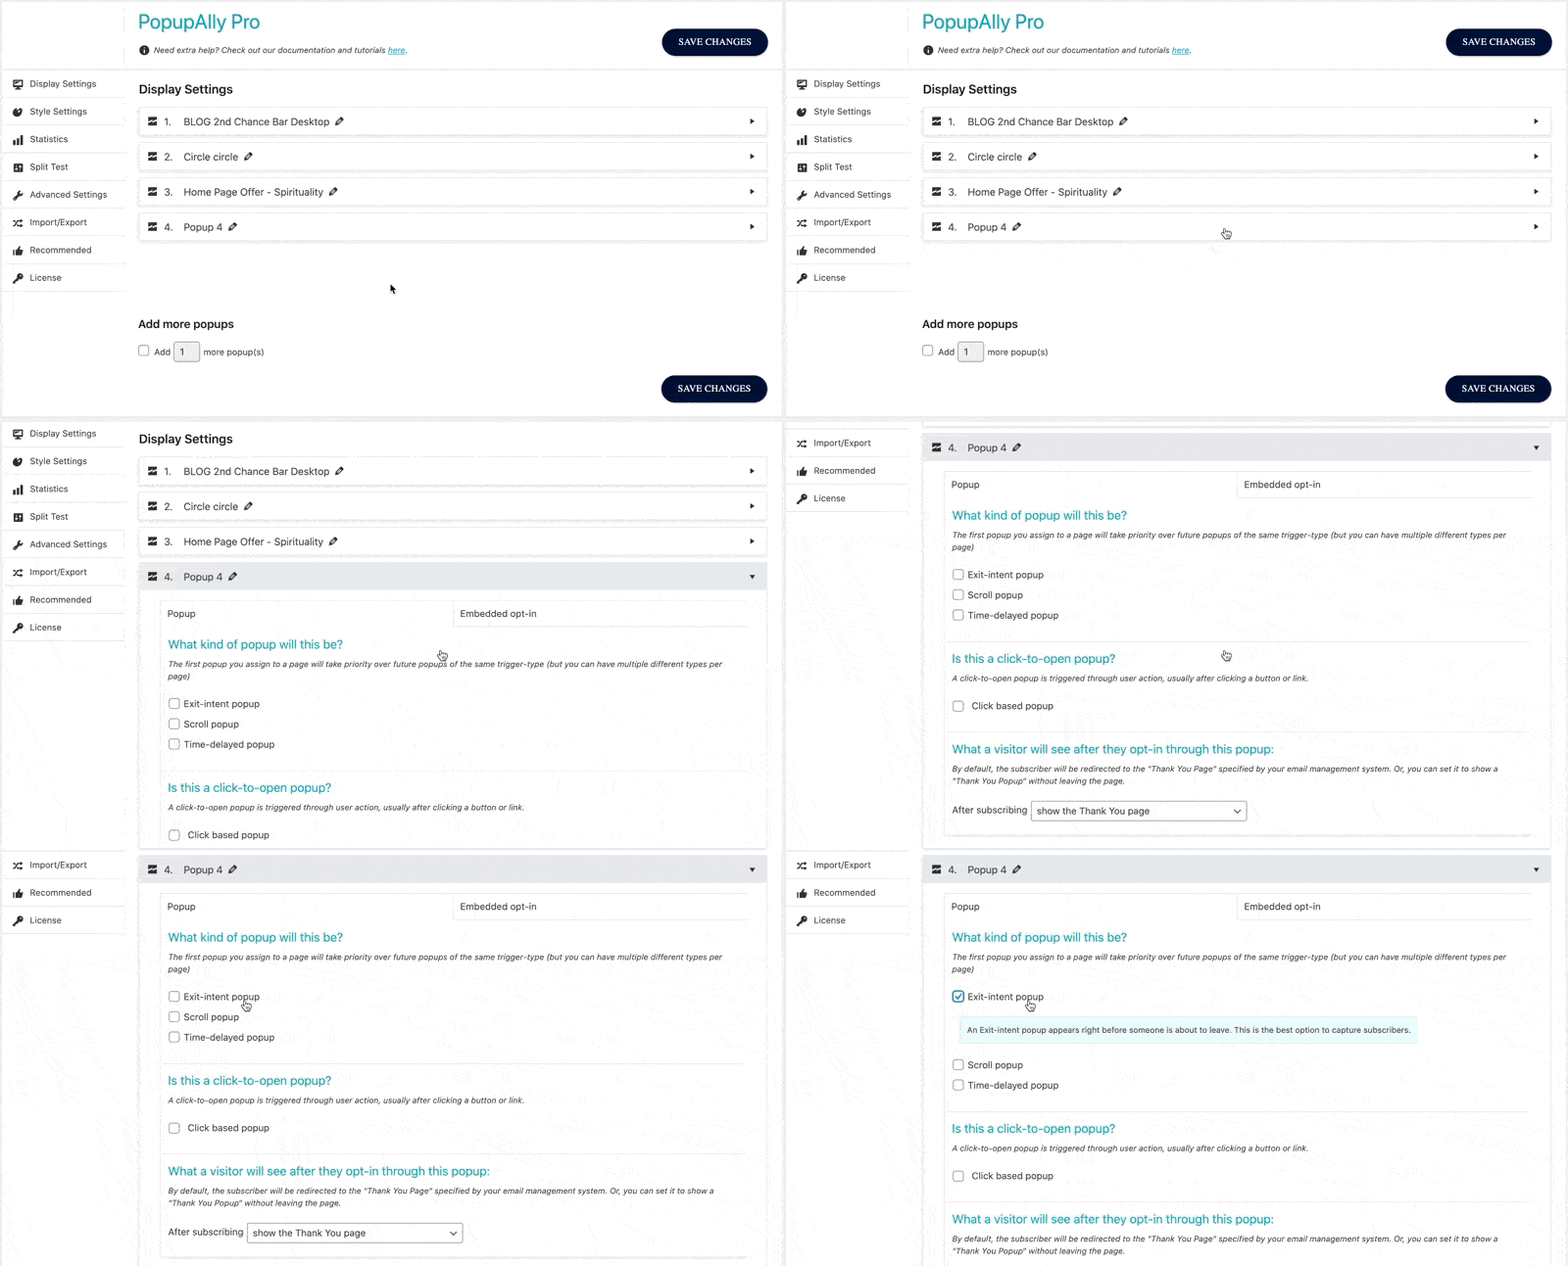
Click on the new popup option to reveal the settings. Check the box next to the type of popup you wish to create.

3. Set up your Thank You Message
In the What a visitor will see after they opt-in through this popup: section, you can choose whether you’d like to:
- Redirect new subscribers to a thank you page (most common)
- Show a thank you popup (on the same page)

Read more about Thank You Page setup here.
4. Choose Which Pages Your Popup Appears On
Scrolling down further, you’ll see a section called Show this popup on which posts/pages?, where you can specify exactly which pages your popup should appear on.

Learn more about this setting here.
5. Limit the number of times your popup shows up for each visitor
The final setting in this area is the section called How to stop showing this popup.
Use these settings to set how often to show your popup, so you don’t annoy your site visitors.
Need a checkbox?
If you’d like to add a GDPR or permission checkbox to your opt-in forms, see how here.