PopupAlly + ActiveCampaign work great together!
Inside ActiveCampaign, you’ll be able to create a new Form for each of the different opt-in offers that you want to create. For instance, you might have different popups or opt-in forms on your site (built with PopupAlly). For each popup, you will want to create a new, unique code.
This short tutorial will walk you through how to get the HTML opt in code from ActiveCampaign for your website opt-in. Then, add this code, directly into your PopupAlly settings in WordPress.
1. Create a new Form

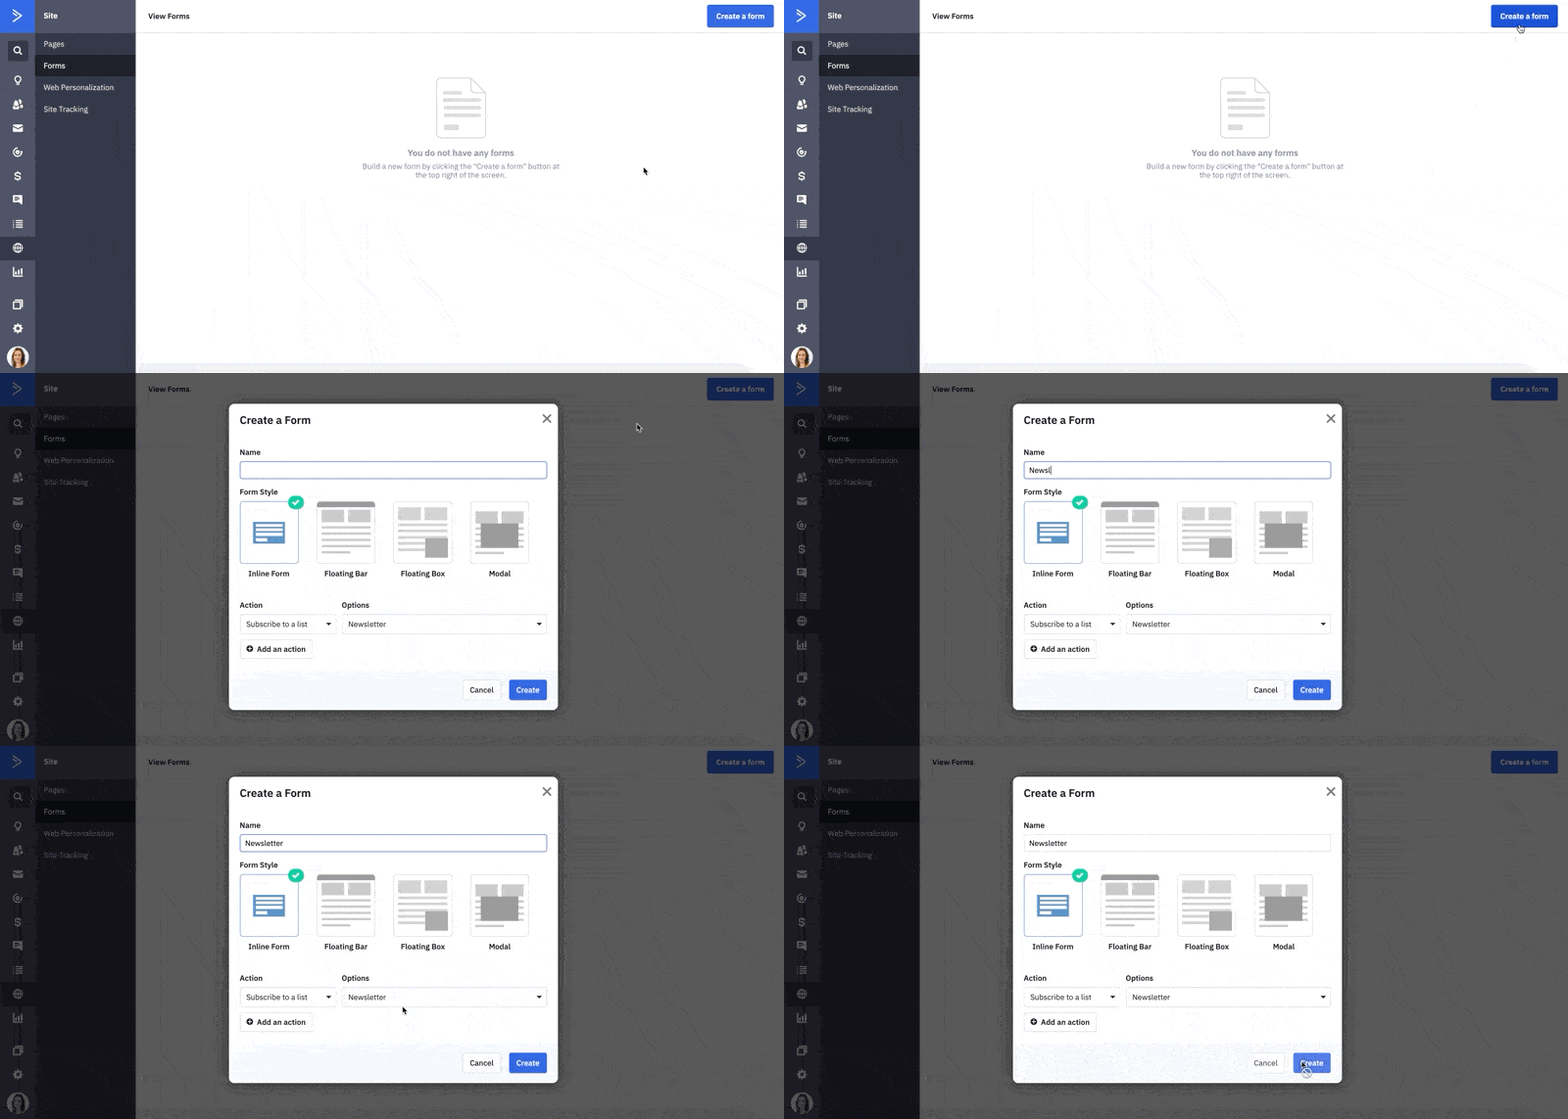
Inside your ActiveCampaign account, go to: Site > Forms > Create a Form.
Select the Inline Form style and give the form a name.
You will also need to designate a list that the subscribers should be added to.
When you’re ready, click Create.
2. Set Up Form Fields & Thank You Page
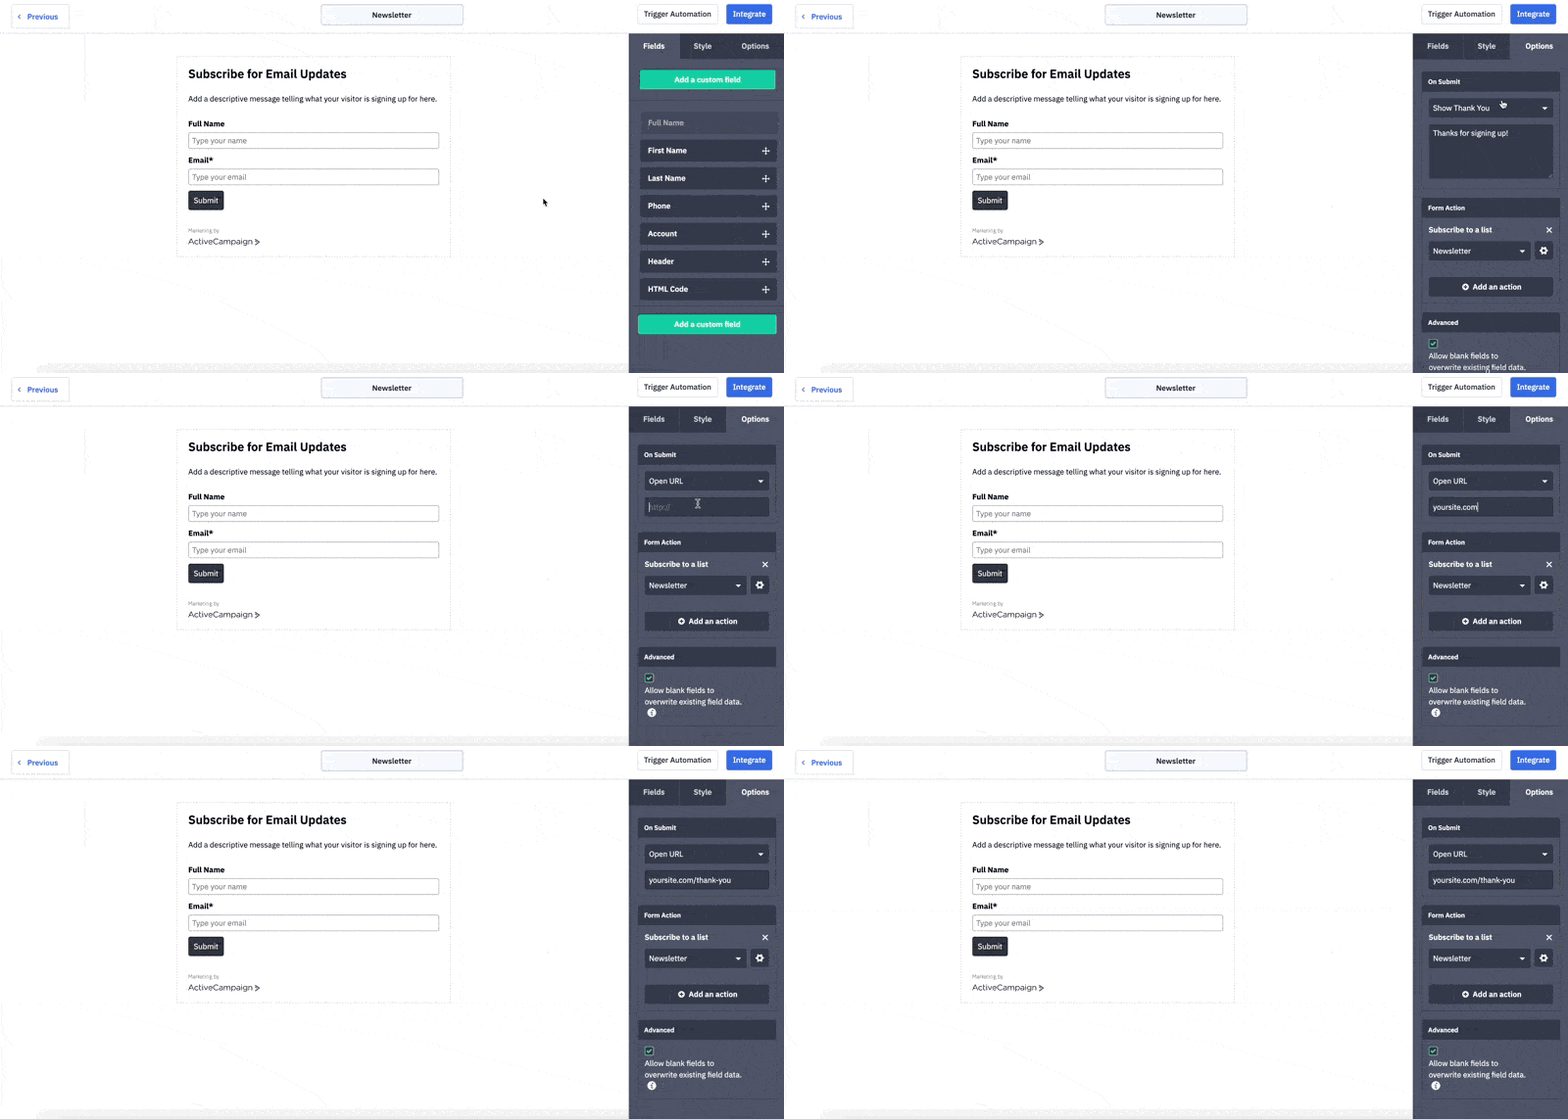
In the form configuration area, go to Options > On Submit. Change the dropdown to Open URL. This URL should be the thank you page that you want your users to be redirected to.

Note: Make sure all of your form fields are configured properly. (The design does not matter, since you’ll be using PopupAlly to create a fully branded opt in design).
3. Obtain the HTML code
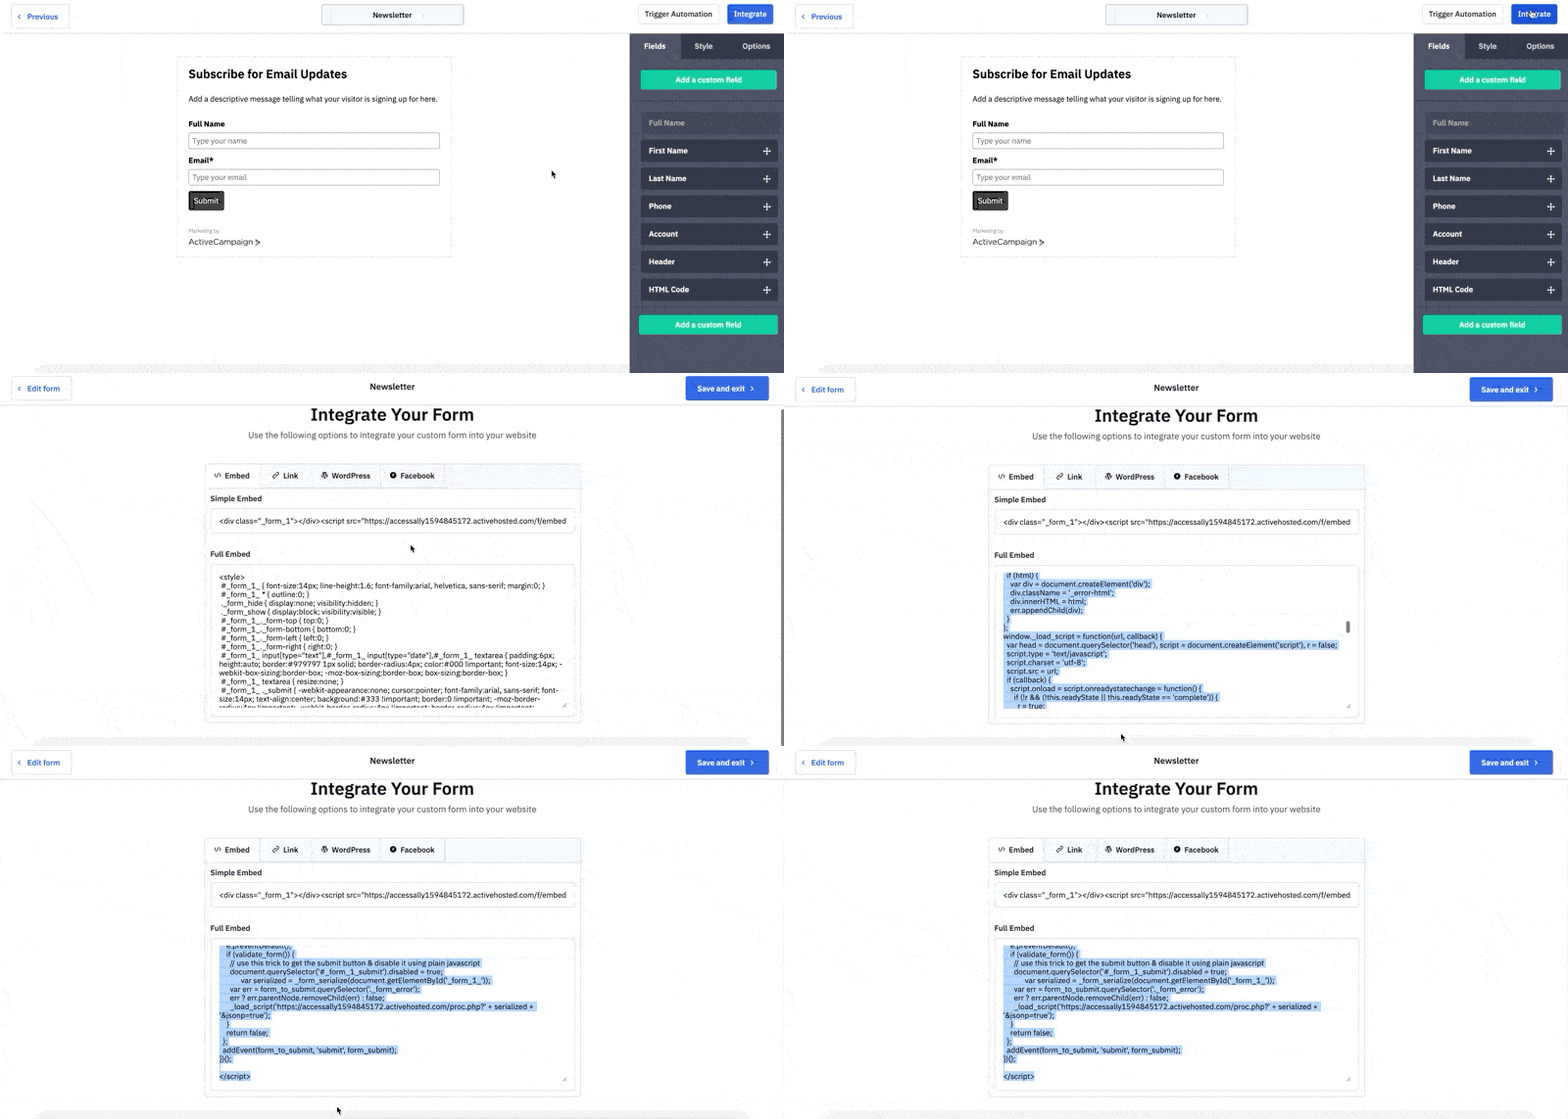
Click on the blue Integrate button in the top right corner of the screen.
The code in the “Full Embed” text box is the form code needed by PopupAlly:

Important: If you’re not seeing the “Full embed” option in ActiveCampaign, please contact ActiveCampaign support.
5. Paste the code into your popup settings
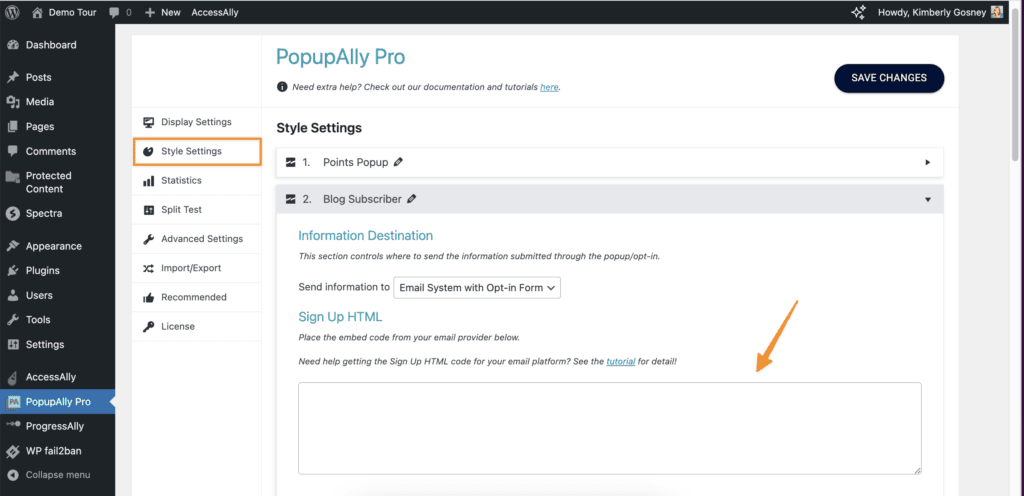
Go to PopupAlly > Style Settings, open your desired popup. In “Send information to” dropdown select Email System with Opt-in Form.
Paste your HTML code in the “Sign Up HTML” section.
