PopupAlly + Ontraport work great together! This tutorial will walk you through how to get the HTML opt-in code from Ontraport and integrate with AccessAlly.
How to get the HTML Code from Ontraport
1: Create a New Smart Form
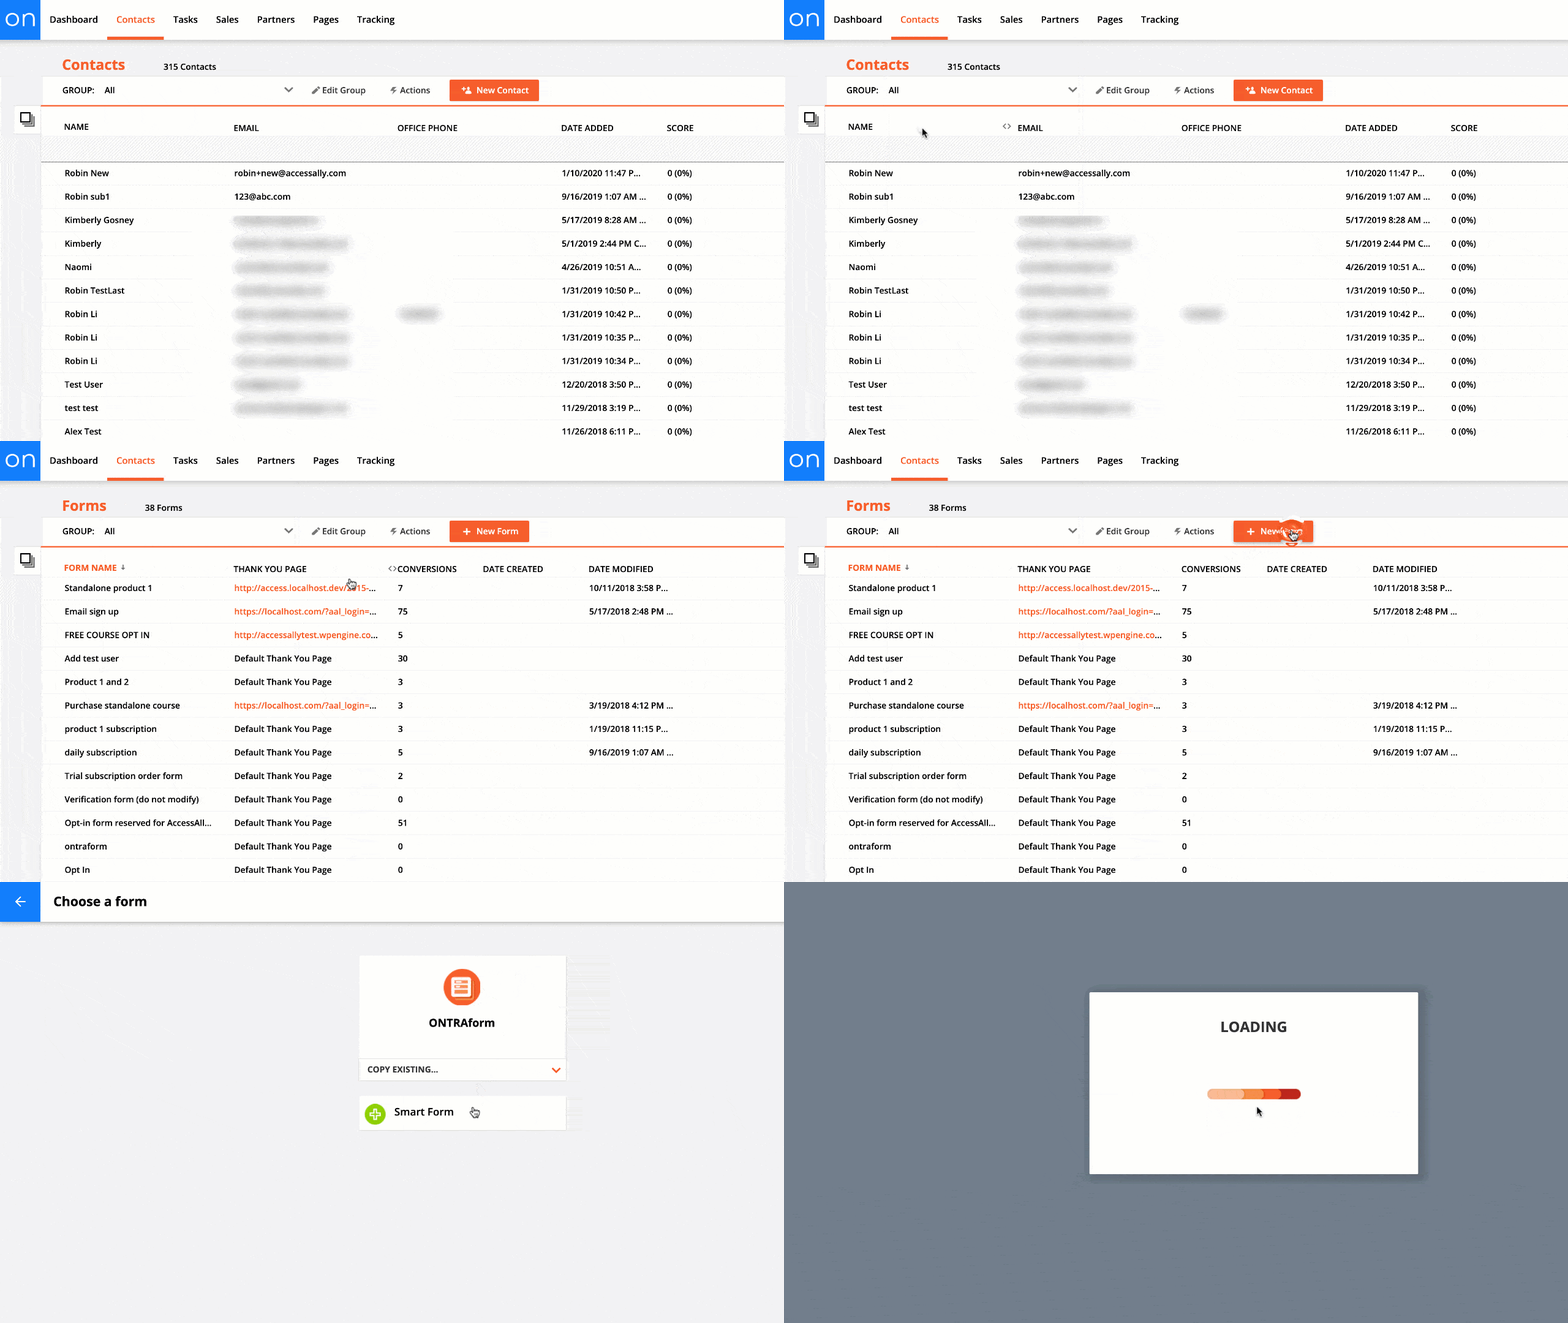
Under the Contacts menu item, go to: Forms > Add New Form.
Important: Make sure to choose the “Smart Form” option, as Ontraforms will NOT integrate with PopupAlly.

2: Configure the Form
Give the form a name and edit what fields to include. Use a name that will easily help you distinguish what this particular sign up form is being used for.

3: Thank You Page Settings
Select the Settings tab to set up a thank you page. We highly recommend selecting your own thank you page, and here’s how to set it up in PopupAlly Pro too: How To Setup the Thank You page.

4: Publish the Form
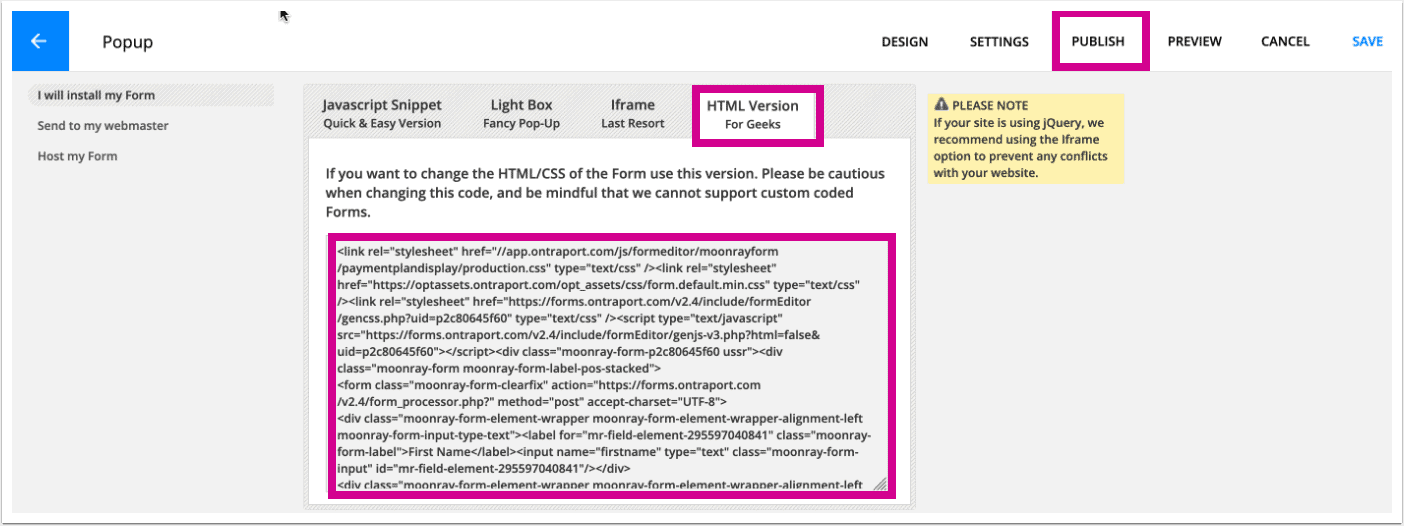
When you’re ready, publish the Ontraport form. This will give you access to the code you’ll need.
5: Copy the HTML Code
Go to the HTML Version tab, and the signup form HTML code is in the text box. Go to: I will install my form > HTML Version for Geeks.
Here, you’ll see the HTML code – copy the entire code, and paste it into your PopupAlly settings inside the WordPress site.
TIP: If you’re not seeing the HTML option, make sure to select the “SMART FORM” option when setting up your form.

6: Add HTML Code to PopupAlly
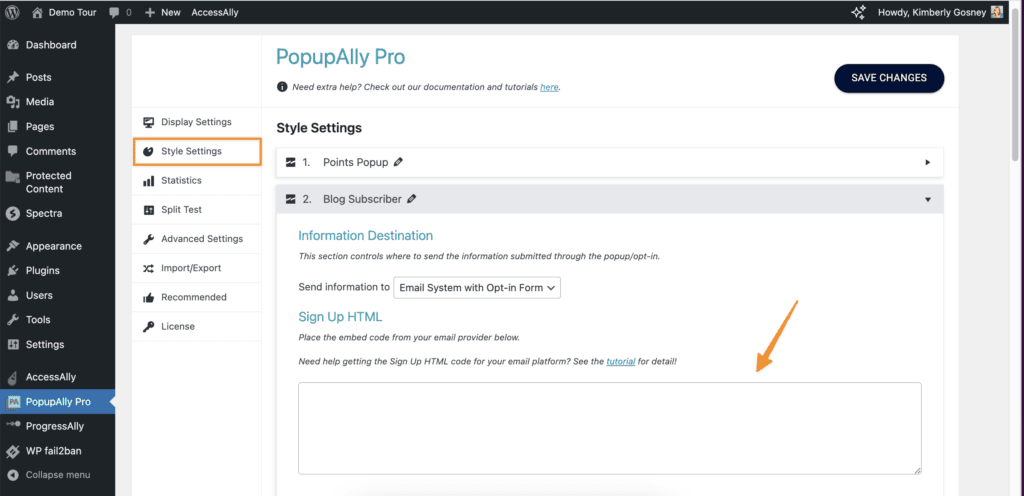
Go to PopupAlly > Style Settings, open your desired popup. In “Send information to” dropdown select Email System with Opt-in Form.
Paste your HTML code in the “Sign Up HTML” section.
